| What's New on the Building Board |

|
|
March 3rd, 2016 I've posted a picture of the finished Luscombe Model 10 No-Cal, and now it's time to get back to the construction sequence that got it there. The last couple of construction posts showed the finished structure, and the color scheme. Now it's time to cover the structure. The first step is to shrink the tissue. I do not attach the tissue to a frame to shrink it, because no matter how tight the shrunk tissue is on the frame, the mere fact that it's tight, means it hasn't shrunk as far as it can, and if the tissue can shrink even a tiny bit more, it's going to warp a fragile No-Cal structure on the first hot, low-humidity day it sees. 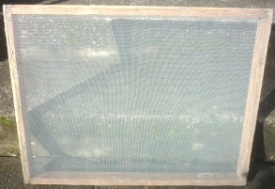 Here's How I do it. Here's How I do it.1) I start by making a screen to lay the tissue on so it can be thoroughly wetted through. I made a 1" x 2" frame bigger than a standard 18" x 24" sheet of tissue, and stapled some plastic screen door screen to it (use plastic screen so it doesn't rust and leave rust spots on your tissue). 2) Turn the frame over so the screen is on the bottom. Take a piece of Japanese tissue and lay it DULL SIDE UP on the screen inside the frame. Now carefully hose/pour water on it until the tissue is completely soaked through. I emphasize carefully - you do not want to introduce creases into the tissue, because they will dry there, and will not completely iron out. If you do this outside, choose a spot completely sheltered from the slightest waft of a breeze so that the tissue does not lift or blow while being wetted, and so become creased. 3) Let the tissue dry completely. When dry, it will be all wrinkled with a pebbled look, but this is how you will be sure that it has shrunk as much as it possibly can. 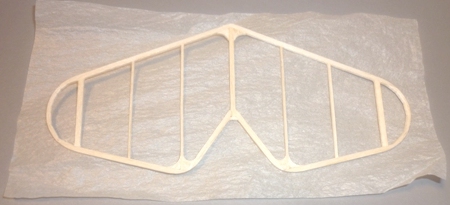 4) Cut a piece of tissue larger than the part to be covered, in this case, the Luscombe 10's stabilizer.
 |
 5) Iron the tissue flat.
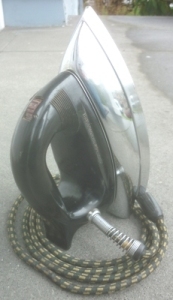
Say what? You've never heard of an iron? This ------------------> . . . is an iron. They (at one time, before permanent press clothing), were used to iron (flatten) the wrinkles out of freshly washed and dried clothes. This particular iron is a DRY iron (as opposed to a steam iron, which can apply steam to the clothing article as you iron it.) You do NOT want to apply steam to the tissue as you are ironing it. If all you have is a steam iron, read the directions to make sure it is safe to use without water, or if it has a 'DRY' setting. 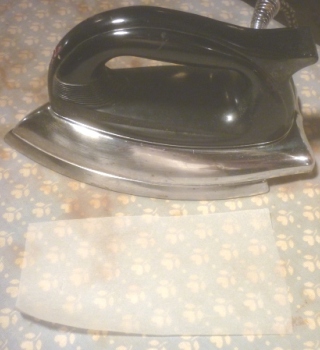 To iron the tissue flat (for a right-handed person) hold the iron in your right hand.
With a thumb and a finger of your left hand, spread the right-hand side of the tissue out flat, and slide the iron onto the tissue between your thumb and finger. Move the iron from side to side, then with the iron holding down the right side of the tissue, use your left hand to pull the tissue out straight to the left, and, moving the iron back and forth across the tissue, work the iron over to the left side of the tissue. Using this technique will prevent you from ironing new creases into the tissue. With the tissue flat, iron back and forth a few times, and you now have a flat piece of tissue with a pebbled look. DO NOT repeat NOT leave the iron laying flat on the ironing board as shown here, which I did just to take the picture. 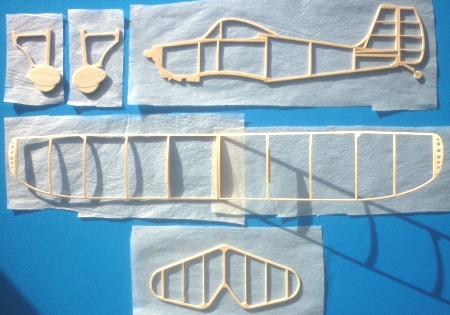 Repeat this process with a piece of tissue for each piece of structure of your No-Cal. For the Luscombe Model 10 (tissue pieces cut out, but not yet ironed in the picture here). I cut out and ironed individual pieces of tissue for the stab, fuselage, each wing half, both landing gear legs, and enough tissue to cover both sides of the wheel pants. Do NOT try to iron an entire sheet of tissue at once.
Next up: Coloring the tissue to replicate the natural metal color scheme. |
|
|