| What's New on the Building Board |

|
|
March 5th, 2016 My Luscombe Model 10 No-Cal project continues with . . . 6) Coloring the tissue Unless you've got some of that very old and ultra-rare silver Japanese tissue (and no, I don't mean white tissue that's been painted silver on one side, I mean actual SILVER-dyed Japanese tissue), representing a polished aluminum color scheme is neither easy nor light weight. The easiest and lightest-weight approach is to just cover the model with white Japanese tissue and pretend it's silver. Other methods include dying the tissue, or painting it. I've done both. A long time ago, I air-brushed a No-Cal Bell XFL-1 Airabonita with heavily-thinned silver paint, which resulted in a very gratifying shiny metallic translucent finish that was actually a good representation of polished aluminum that didn't add too much weight. This is the approach I decided to take on my Luscombe Model 10 No-Cal. 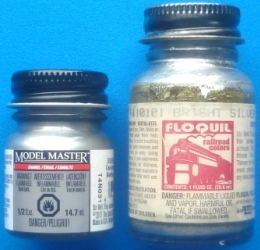 A quick check of my paint stocks however, revealed that sadly, the bottle of paint I had used, my treasured bottle of FLOQUIL #110101 BRIGHT SILVER (on right side of picture), was all dried up. Worse, I found it was no longer even being made. With the knowledgable assistance of Emil, the proprietor of SKYWAY Hobby shop, I decided to try MODEL MASTER SILVER CHROME TRIM (left side of picture) as a replacement.
As a test, I thinned it about 5 to 6 parts thinner to one part paint, and air-brushed a VERY light, even coating on a piece of ironed tissue and let it dry. This produced a very satisfactory translucent metallic color, but a test coloring with the red felt-tip pens showed that they didn't work well over the silver paint. The red color was rather flat, and the paint rubbed onto the pen's tip, diminishing it's effectiveness. I would need to mask the tissue off to keep the silver paint off the areas where the red felt-tip pens would be used. This involved masking off parts of the fuselage, tail, and wheel pants with a tape that would not tear the tissue. I tried the relatively low-tack Tamiya Yellow Tape, but while it works fantastically on plastic models, it didn't do quite as well as I'd hoped, pulling a small amount of the fibers off the top of the tissue when I was finished. This was not enough to affect the tissue while covering or decorating, but I would recommend leaving it on only long enough to do the painting, and then immediately removing it. Another option is to use Friskit Paper, which is a low-tack masking material. I'll try that next time. 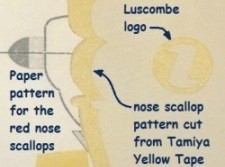 To mask off the tissue where the red coloring would be, I stuck a piece of Tamiya Yellow Tape to a clean hard surface, cut out paper patterns of the markings from the plan, traced them onto the tape, and cut them out. Here are the two nose designs cut from the tape. ------>
The next step was to trace the locations of the fuselage markings onto the tissue. A piece of tissue was ironed flat, taped down over the fuselage plan, and the marking outlines traced in the appropriate color ink. In this case, all the red trim designs were outlined in red, and the canopy outline was outlined in black, like this . . . 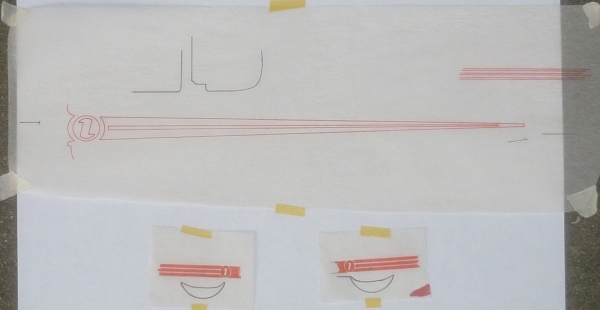 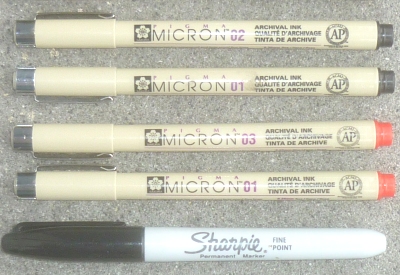 Until quite recently, I used Koh-i-noor drafting pens and india ink to apply my markings. Now there are a variety of fine-tip felt pens in many different widths that make the task easier for those without a drawer full of drafting implements. Here are the pens I used on this project. ----->
 |
Tape masks for the canopy, nose scallops, nose logo, fuselage stripes, tail stripes, wheel pant stripes, and logos, have been applied to the tissue . . .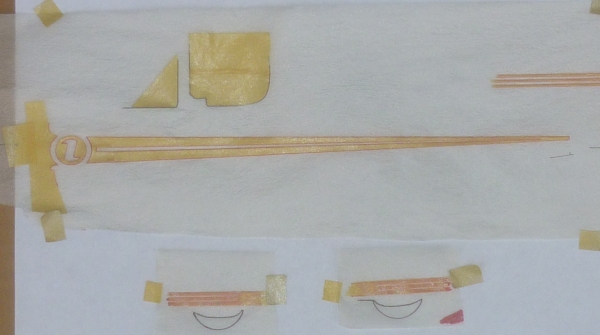 With the fuselage and wheel pants tissue masked off, all the tissue pieces are ready for painting. The silver paint was thinned so that it produced a barely visible silver sheen on the tissue. I didn't measure it, but I believe it was about 5 to 6 parts thinner to one part paint. The thinner evaporates while air-brushing, and this produces a very nice even metallic effect, very like polished aluminum, while still leaving the tissue translucent enough to trace the markings onto it, and not adding too much weight. Next post: applying the rest of the markings, and covering the structure. |
|
|