| What's New on the Building Board |

|
|
March 8th, 2016 The Luscombe Model 10 No-Cal build continues with . . . 7) Decorating the tissue. 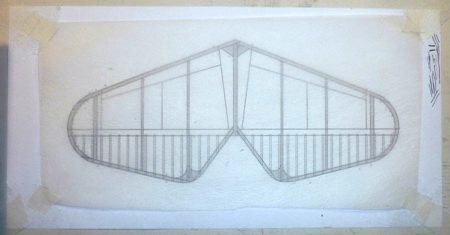 Using the stabilizer as an example, iron the stab tissue flat again, and using small pieces of tape, tape the ironed-flat piece of tissue over the plan drawing so the markings and panel lines can be traced onto the tissue. The silver paint will be so thin, you'll be able to see right through it to trace the markings.
At this point, you will quickly discover just how effective the iron is at shrinking the tissue. If you tape the tissue down directly after ironing it, within less than a minute or two, the tissue will be loose. That is because the tissue has absorbed enough moisture right out of the air to expand. Ignore this looseness as best you can, being carefull not to tear the tissue as you apply the markings. The looseness will make the markings less precise, but when it is applied to the structure, nobody will ever notice. 8) Time to apply the markings. I use straight edges and drafting triangles to keep the lines straight. Here I've shown the markings applied to the stabilizer tissue. To allow for some placement error, always extend any line that goes to the edge of the structure well past the edge of the structure so that when the tissue is trimmed, the marking line won't stop before it reaches the edge of the structure. 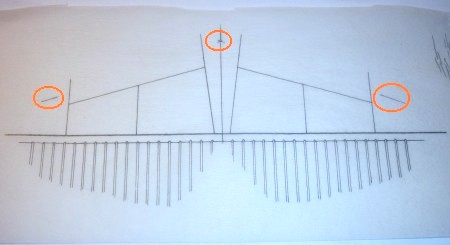 Don't Forget to add alignment reference markings so that the tissue can be properly aligned with the structure when covering!
In this picture, I've circled the alignment marks in red. They represent the front of the leading edge of the stabilizer. I also add a centerline in the middle of the stabilizer (it will be hidden by the fuselage structure after assembly). I usually color in solid markings on a model after I've covered the parts, but the red trim lines on the fuselage would be much easier to apply and fill in before covering the structure. After spraying the tissue, I pulled the Tamiya Yellow (masking) tape off, ironed the tissue again, and taped it down onto the drafting board so I could get the red trim lines as straight as possible. Using a straight edge and a red fine-tip felt pen, the red trim was carefully applied. Here's the result . . .  Panel lines and control surfaces were added to the rest of the pieces of tissue in the same manner as the stabilizer and fuselage - iron the silver-painted tissue, tape it over the plan, and trace the panel lines and markings onto the tissue, including the 'N' numbers on the wing and tail, and the tiny 'EXPERIMENTAL' on the fuselage under the canopy (not yet added when this picture was taken). Next up: Covering the structure. |
|
|