| Back to the Golden Age Racer No-Cals page |

|
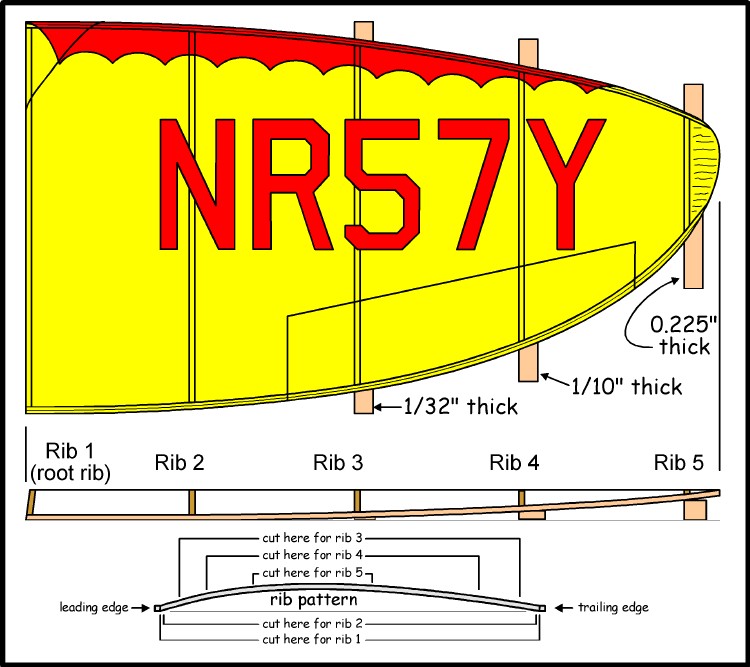
After losing my original CR-3 No-Cal on an OOS flight outdoors, I decided to make a replacement.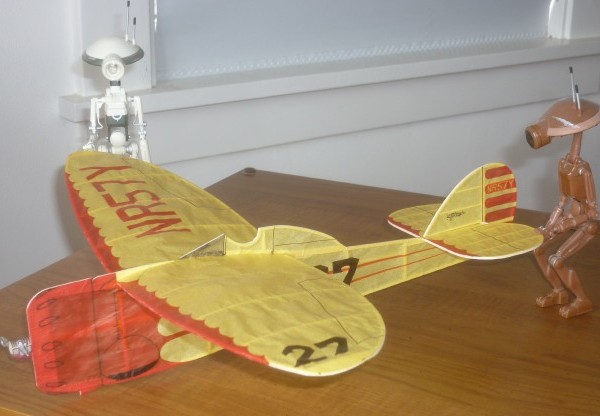 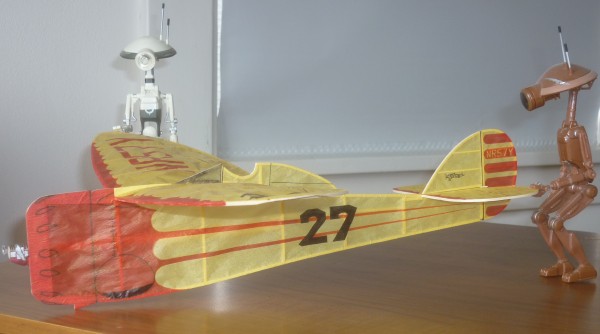 I incorporated several modifications on the new version. o The first modification was to incorporate a balanced motor tube (equal lengths of rubber before and aft of the CG). This was to facilitate flight trimming, so I wouldn't have to re-balance the model every time I changed motors. o The second modification was to simply replace the plastic windscreen/canopy with a balsa/tissue built-up version. The plastic was heavy, and it was behind the CG. o The third modification was a bit more involved. I built the wing in such a manner that each wing half could be covered with one sheet of tissue, instead of requiring a separate piece for each rib bay. An elliptical wing with the leading and trailing edges built flat on the building board results in compound curvatures over adjacent rib bays,which reqiures covering each rib bay with a separate piece of tissue. However, if you line up the wing ribs so they are all in the same plane, an entire wing half can be covered with one piece of tissue, elliptical shape or not. To do this, the leading and trailing edges cannot be built flat on the board. They must be laminated so that each successive rib is slightly higher off the board than the last so that when the ribs are viewed from the tip, they all line up and have the same curvature. While you can use the same rib pattern for all the ribs, each rib must be cut at a specific point for both the leading edge and trailing edge joints. The illustration below shows the details on how to build the wing this way. The process is described below the illustration. |
 |
|
How to Build the Wing 1) Pin progressively taller risers to the building board at rib locations 3, 4, and 5 - a 1/32" sheet riser for Rib 3, a 1/10" thick riser for Rib 4, and a 0.225" (that's equal to 1/8" + 1/10") thick riser for Rib 5. 2) Laminate the leading and trailing edges over the risers so they rise as they progress towards the tips. Allow to dry completely. 3) Cut each rib to length from the same rib pattern as shown on the bottom of the illustration below. You might want to make each rib just a fraction longer at each end to account for the curvature of the leading and trailing edges that it will be trimmed to. 4) Glue the ribs between the leading and trailing edges. 5) Cut the wingtip from 1/32 sheet and edge-glue it to Rib 5 so that it matches the curvature of Rib 5. 6) Allow the wing structure to dry, then carefully remove it from the plan and sand the edges of the leading and trailing edges to match the contours of the ribs. 7) You can now cover the wing half with just one piece of tissue! |
| Back to the Golden Age Racer No-Cals page |
|
|
Michael A. Morrow's
AERO ACES
- Doing Business since 1995 !
AERO ACES is a TRADEMARK of Michael A. Morrow. © All Images, drawings, plans, articles, and kits, are Registered & Copyrighted by Michael A. Morrow |