|
|
by Michael A. Morrow |
|
|
The horrible economy being what it is, and having a LONG list of No-Cals I want to build which would require a significant expenditure on specialty motor tube wood, I wondered if it would be possible to make my own motor tube wood, so some time back, I looked into it. After much research, the only fiscally prudent (read 'cheap') way to do it seemed to be sanding wood down to the proper thickness. Many pros and cons were related on various forums, with the super-competitive types siding on the "buy it, don't make it" side, and those less competitive types siding on the "I'll give it a try" side. For the volume of wood I needed, and the cost it would entail, I decided to try it myself, as I've never really been that picky about the wood I used anyway, being much more concerned about the flight-trimming properties of a model utilizing a motor tube as opposed to one using a motor stick. The following short picture essay shows how I went about sanding my own motor tube wood. |
|
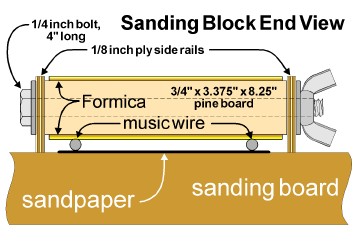
The first step was to make a sanding block. Adjustable side rails would allow different sheet thicknesses to be made. Music wire spacers between the sanding block and the sanding board are used to set the height of the block for the thickness sheet you want. Neil Knutson, a local indoor flyer, has sugggested that brass shim stock could also be used. |
|
|
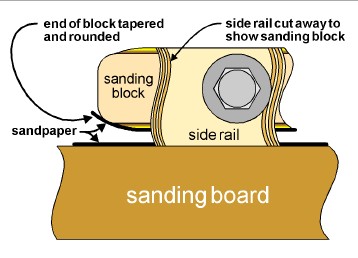
I tapered the ends of the sanding block so the sandpaper wouldn't gouge the wood while sanding . . .
|
|
|
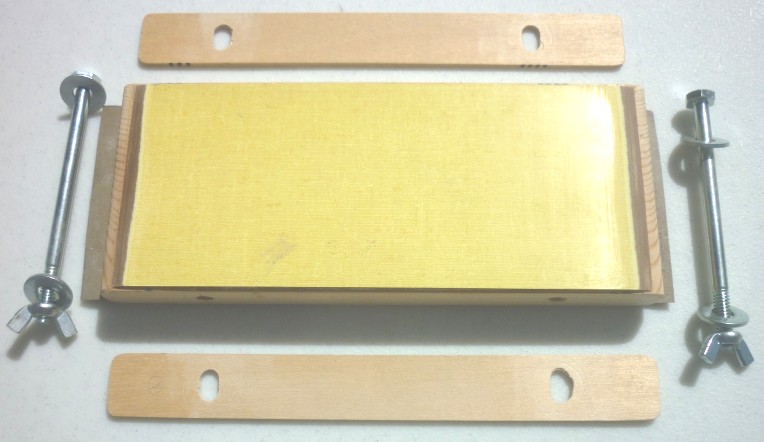
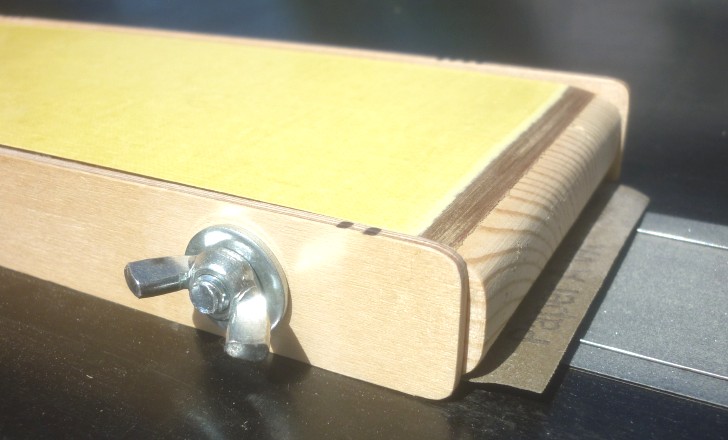
Here are the sanding block parts. The side rail holes are elongated so that the rails can be adjusted up and down. The block is a piece of 3/4" x 3.375" x 8.25" pine with scrap pieces of Formica glued on the top and bottom. The side rails are 1/8" plywood sheet. |
|
|
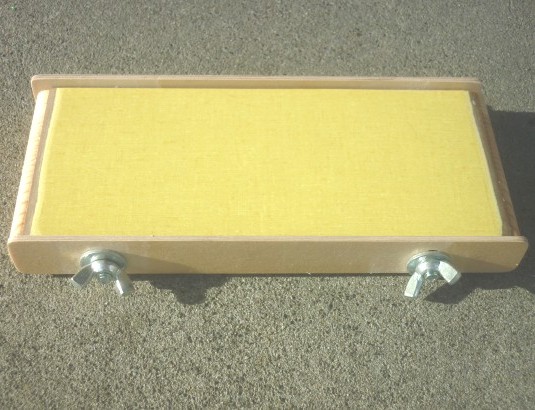
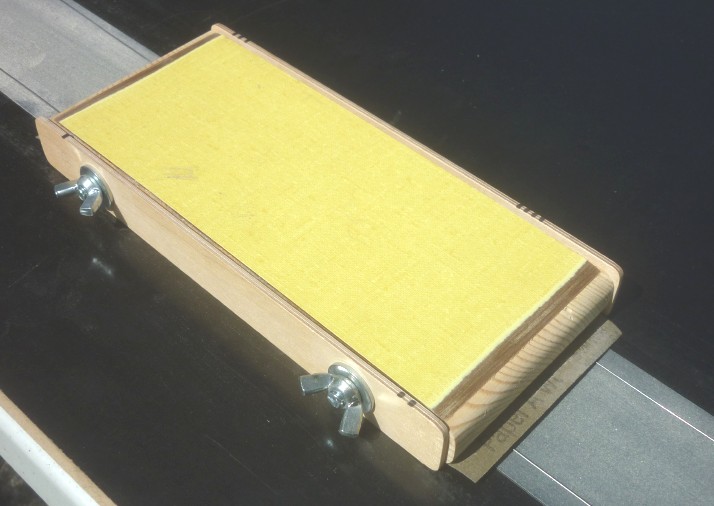
Here's a photo of the assembled sanding block - you can see the tapered edges on the Formica and the rounded ends on the sanding block so the sandpaper doesn't gouge the balsa wood sheet being sanded. I glued Formica to the wood block so that when I want to change sandpaper, it won't be too hard to get off. |
|
|
Here I've cut a piece of sandpaper to size, ready to glue to the sanding block. To ensure a good flat sanding surface, I removed the side rails, applied spray-adhesive to the back of the sandpaper, and then pressed the sandpaper onto the sanding block. Then I used a roller on the sandpaper to flatten it out. A printer's brayer (hard rubber roller with a handle) works well to make sure the sandpaper is as flat as possible. |
|
|
Here's the block with the sandpaper glued to it . . . |
|
|
Next up is the sanding board. It needs to be flat and smooth. I found a piece of one inch thick particle board with a smooth plastic finish in the scrap pile that worked nicely. I cut a piece of 220 grit wet or dry sandpaper in half lengthwise and adhered the two pieces end to end to the board using spray mount. This sandpaper holds the wood in place on the board while you're sanding it. The previously-mentioned printer's brayer works nicely for this. |
|
|
For my trial run I wanted to make a piece of 0.020" thick sheet, so I used two pieces of 0.020" diameter music wire as spacers. Here you can see the two pieces of wire laid on top of the sandpaper on the sanding board . . . |
|
|
. . . and here's the sanding block resting on top of the two pieces of music wire, ready for the side rails to be adjusted. |
|
|
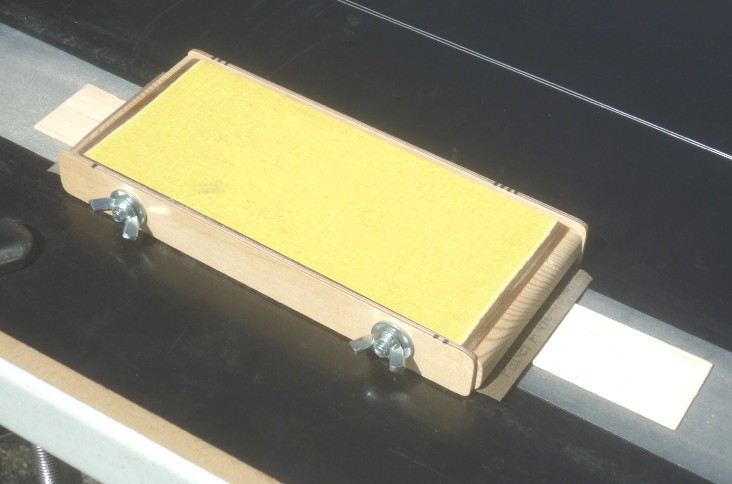
I've loosened the wingnuts to allow the two side rails to drop down onto the sanding board, and then re-tightened the wingnuts locking the side rails in place. |
|
|
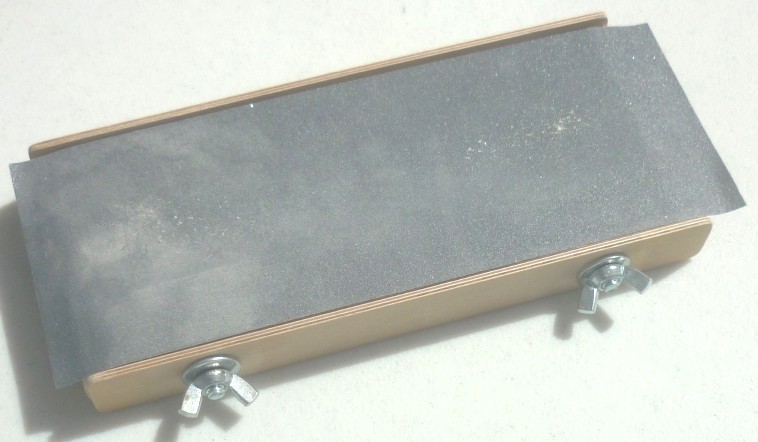
A piece of sheet ready to be sanded . . . the sandpaper on the sanding board doesn't actually do any sanding. The friction of the sandpaper holds the sheet of wood in place while the sanding block does the actual sanding. |
|
|
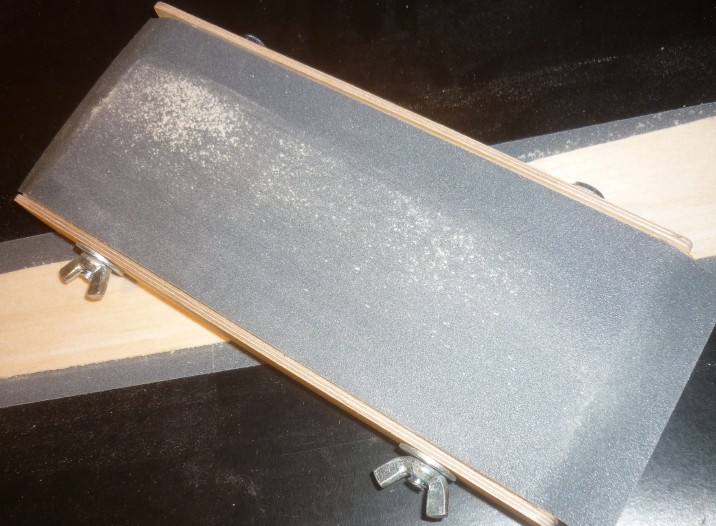
Sanding in process! |
|
|
It only takes a few strokes for the sandpaper to get loaded up. I use a small whisk broom to brush the sanding dust off the block. |
|
|
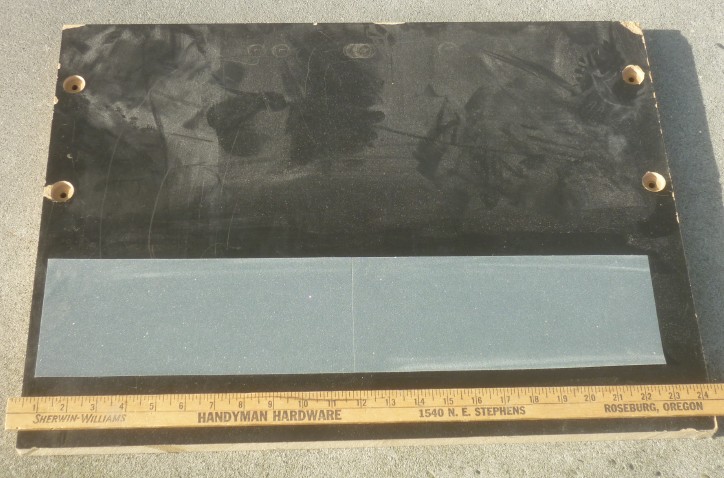
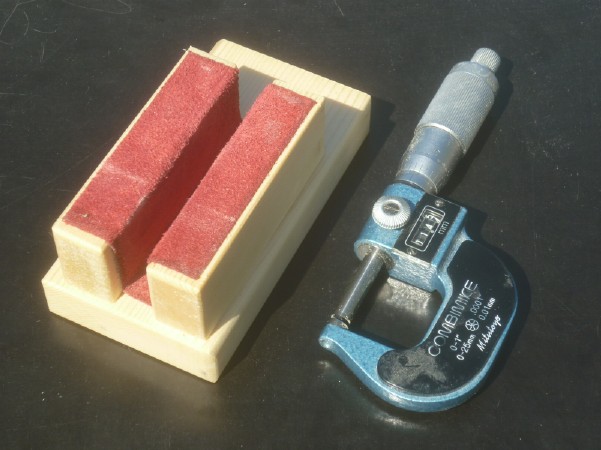
Making sure the sheet was the right thickness required frequent measuring during the sanding process. Measuring was a pain because it took three hands to do it - one hand to hold the sheet, and two hands to operate the micrometer. To make it easier, I made a little stand which allowed one-handed operation of the micrometer. Here's the micrometer and the stand . . . |
|
|
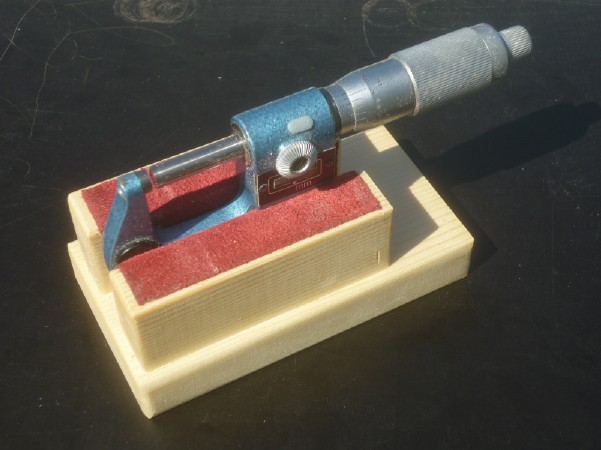
. . . and here's the micrometer in the stand. A very nifty tool. |
|
|
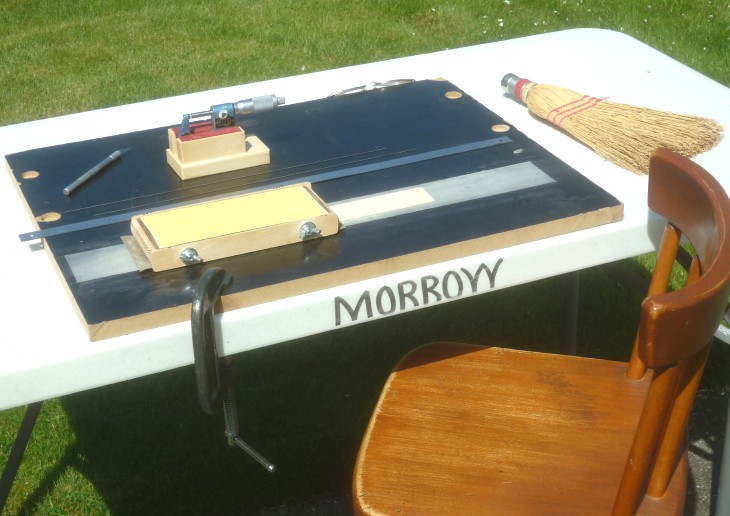
I was surprised at just how much sanding dust comes from sanding down a piece of sheet - a LOT! After the first sheet, I vowed all future sanding would be done OUTSIDE! So here I'm set up outside - you can see all the major bits - the sanding board clamped to the table, sanding block, micrometer stand, and a whisk broom to keep sanding dust from building up on the sandpaper. |
|
|
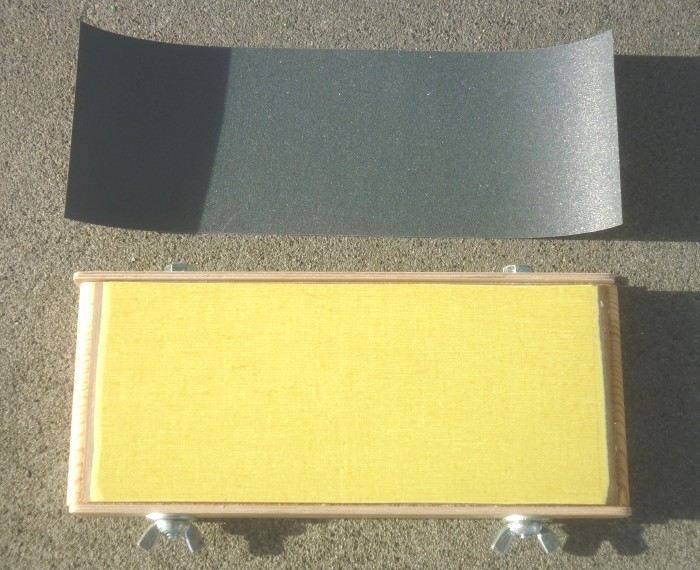
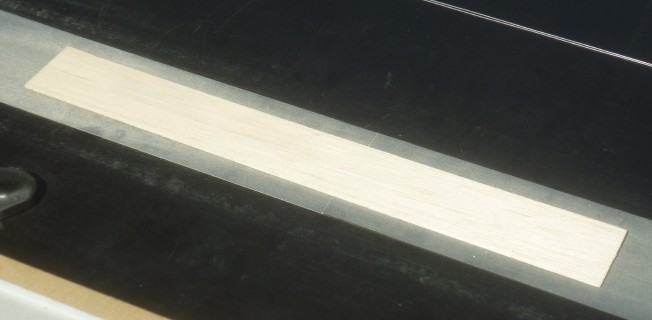
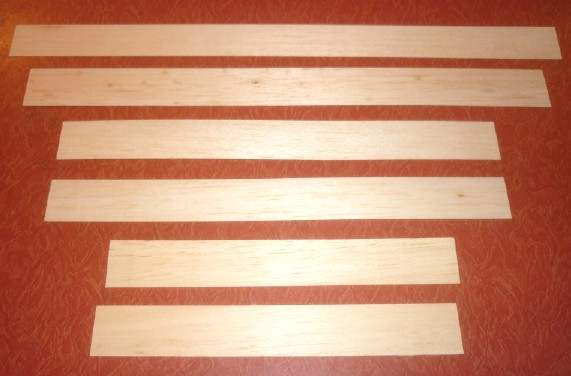
And here's the end result - six pieces of 0.020 sheet (+ or - a couple thou - mostly minus), ready to roll! (sorry, couldn't resist) :-) |
|
|
|
|
|
Michael A. Morrow's AERO ACES - Doing Business since 1995 ! AERO ACES is a TRADEMARK of Michael A. Morrow. © All Images, drawings, plans, articles, and kits, are Registered & Copyrighted by Michael A. Morrow |