|
|
by Michael A. Morrow |

|
|
I used green Japanese tissue as the base color when I covered the Do-335 and a felt tip marker for the darker green. The bottom of the fuselage was sprayed light blue using an airbrush, and the crosses were cut from white domestic (shoebox) tissue and applied with a glue stick. I like the way it came out. As an alternative to airbrushing the bottom of the fuselage blue, a piece of white tissue could be layed over the green tissue, cut through both layers along the color separation line, overlapped a little, and glued together with a glue stick before covering the fuselage. After the fuselage is covered, the white tissue can be colored in with a blue felt-tip marker. If you follow the process below, you'll need to shrink a piece of green Japanese tissue before you start. See the section on shrinking Japanese tissue for use on No-cals here. |
|
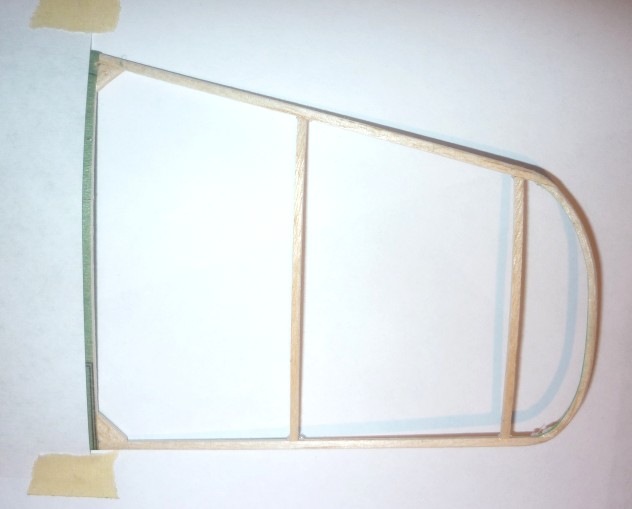
Here's the Do-335 structure ready for covering . . .
|

|
|
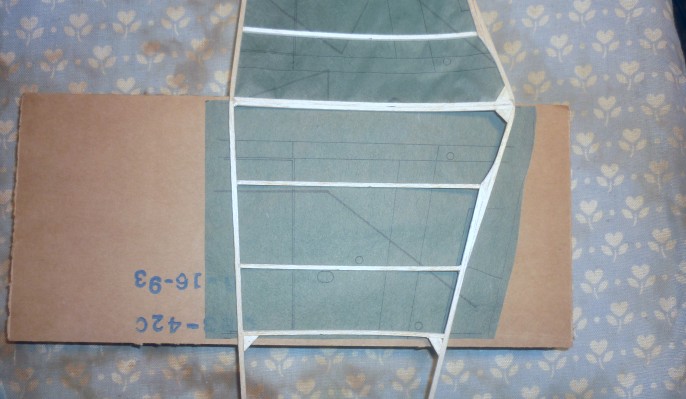
The Do-335 has polyhedral, so covering the inner wing panels requires a flat elevated surface the width of the panel to lay the tissue on, so that the structure can be rolled onto the tissue. I did this by cutting a piece of cardboard the proper width and placing it on top of a wood block. In this view you can see the tissue panel has been placed upside-down on the cardboard, and the wing structure is being rolled onto the tissue. |
 (Click photo to enlarge)
|
|
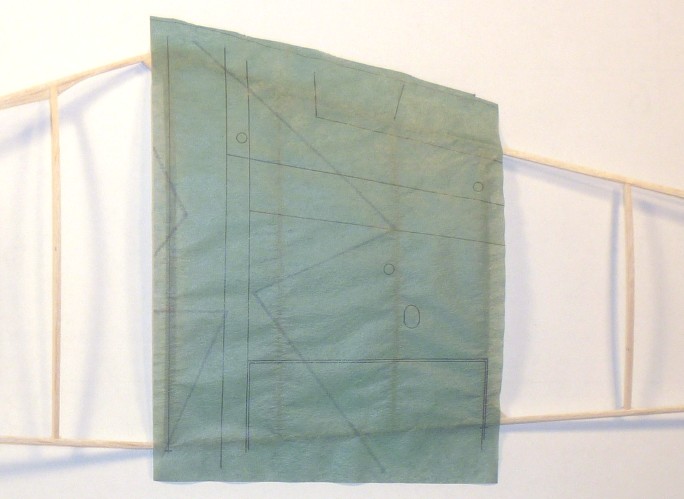
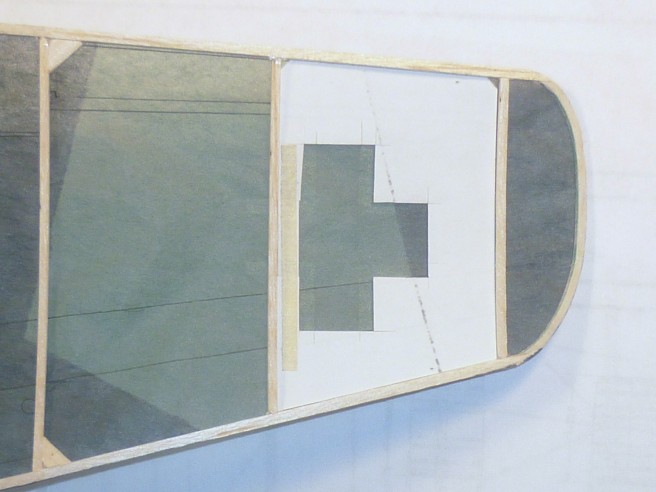
I use spray adhesive to attach the tissue. When covering a wing, only one panel can be covered at a time, so the other panels must be masked off to prevent overspray. Here an inner wing panel (already covered) has been masked off with a piece of paper, leaving only the rib (the green stripe) exposed to be sprayed with adhesive along with the rest of the outer panel. |
 (Click photo to enlarge)
|
|
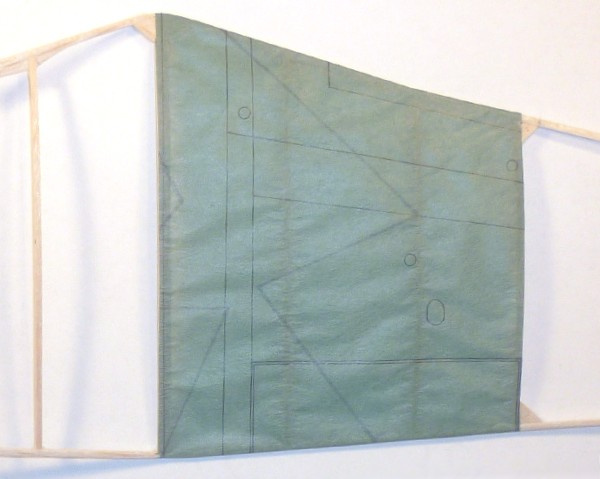
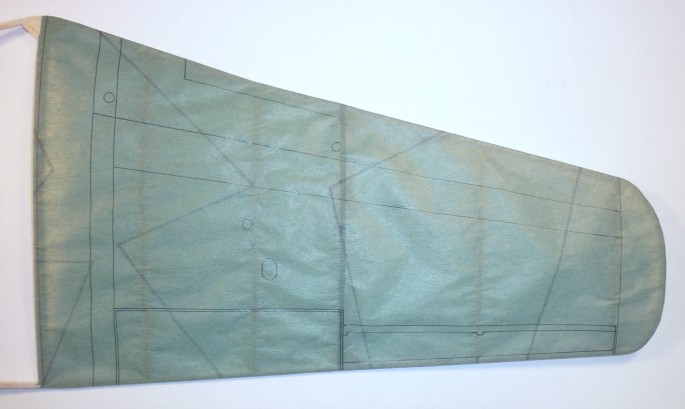
Here the inner right panel has been covered. |
 (Click photo to enlarge)
|
|
When the adhesive is dry, the excess tissue can be trimmed away. Note that the splinter camoflage color separation lines extend off the tissue on the left. When the outer right panel is covered, the color separation lines and panel lines on the inner panel will be extended onto the outer right panel. |
 (Click photo to enlarge) (Click photo to enlarge) |
|
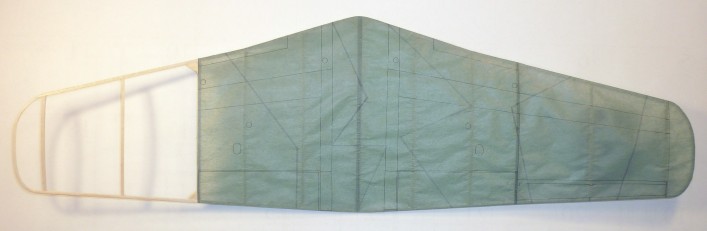
In this view, the outer right panel has been covered. Note that the splinter camoflage color separation lines that cross over to the inner right panel have been added to the inner panel. The spanwise panel lines were left off the outer panel until it was attached to the structure. After the adhesive dried and the tissue was trimmed, the panel lines were carefully added so that they lined up with those on the inner panel. |
 (Click photo to enlarge) (Click photo to enlarge) |
|
Here's the wing with three of the panels covered . . . . . . and here it is with all four panels covered. In the enlarged view you can see how the panel lines on the outer panels have been added to match the panel lines on the inner panels, and how the splinter camoflage color separation lines also line up. |
 (Click photo to enlarge) (Click photo to enlarge)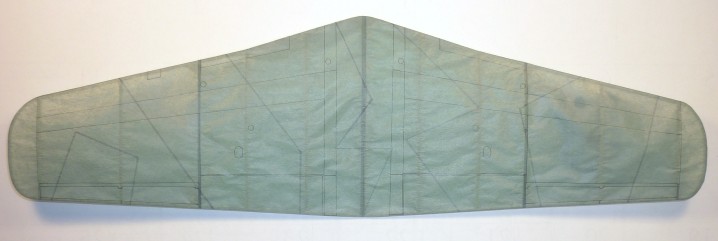 (Click photo to enlarge) (Click photo to enlarge) |
|
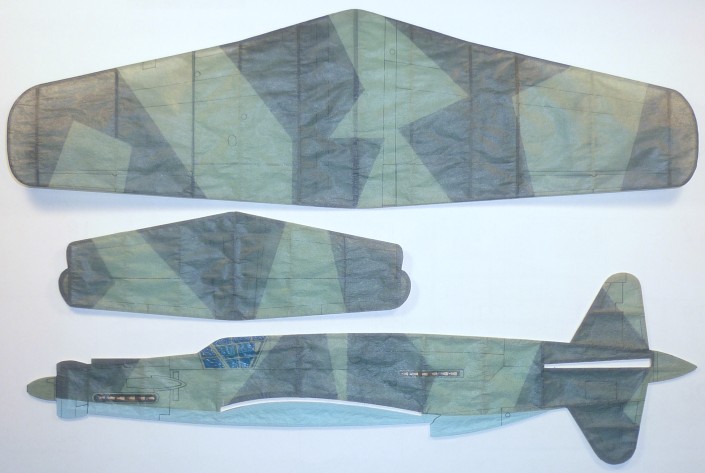
The dark green of the splinter camoflage is achieved by using a PRISMACOLOR #PM-115 COOL GREY 80% felt tip marker, which worked very nicely. Using this color grey on the green tissue makes almost the perfect dark green. The top of the fuselage was then masked off and the bottom spayed light blue, after which the panel lines on the blue were re-inked. The exhaust stacks and canopy were painted using model paint. Alternatively, the canopy could be colored in using a dark felt-tip pen.
|
 (Click photo to enlarge) (Click photo to enlarge) |
|
All the crosses on this aircraft are white. I cut the cross pieces from shoebox (domestic) white tissue and glued them on with a glue-stick. To align them, I made an index card template and fitted it into the rib bay on the bottom of the wing. With a back-lit light source, it provides an outline to align the pieces of the white cross. You can also outline the crosses when decorating the tissue, and place the white cross pieces over the outlines. |
 (Click photo to enlarge) (Click photo to enlarge) |
|
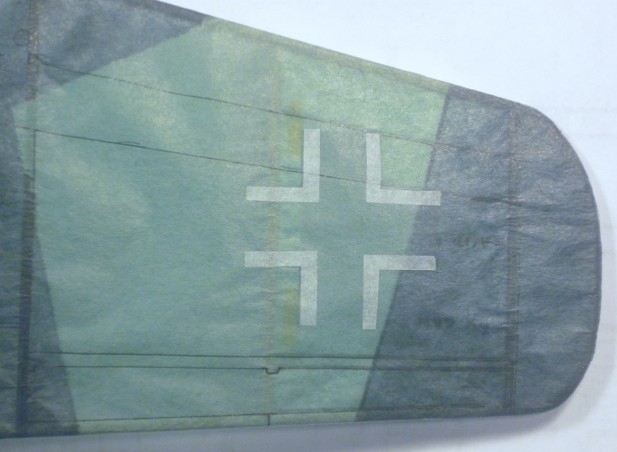
Here's the white cross pieces attached to the wing.
|
 (Click photo to enlarge) (Click photo to enlarge) |
| . . . and
here's all the white crosses attached . . . |
 (Click photo to
enlarge) (Click photo to
enlarge) |
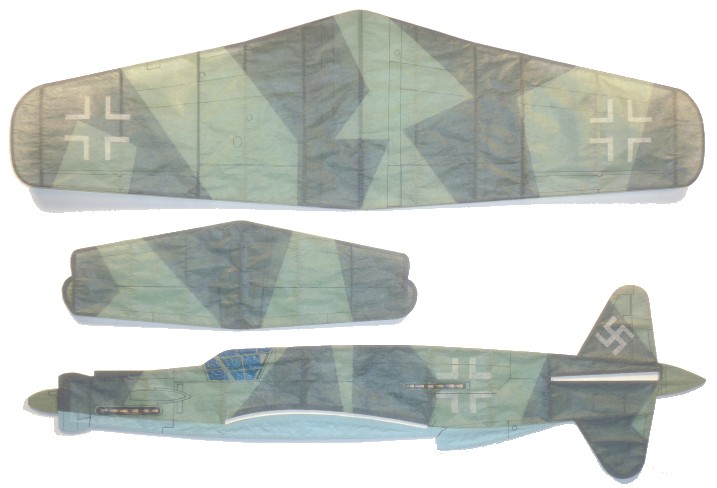
| . . . and
here's the finished Do-335 ready for flight. |
 (Click photo to enlarge)
 |
|
Michael A. Morrow's AERO ACES - Doing Business since 1995 ! AERO ACES is a TRADEMARK of Michael A. Morrow. © All Images, drawings, plans, articles, and kits, are Registered & Copyrighted by Michael A. Morrow |