|
|
by Michael A.Morrow |

|
| For the Kawanishi N1K1-J Shiden production fighter color scheme (green on top and ash-gray on bottom), you'll need to shrink a piece of white Japanese tissue before you start. See the section on shrinking Japanese tissue for use on No-cals here. |
|
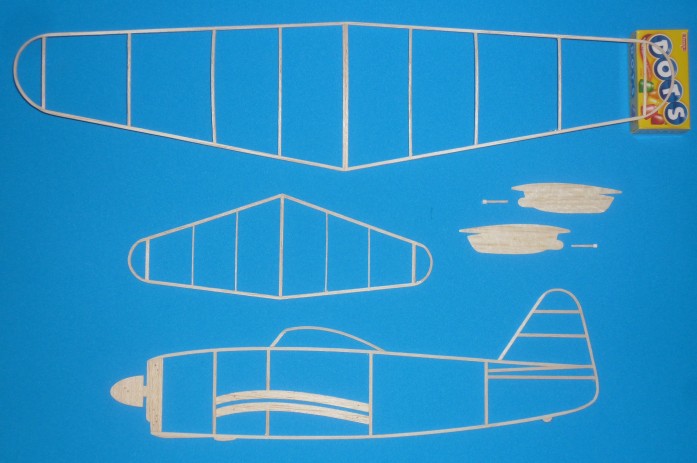
Here are the finished structural parts ready to be covered. The entire model will be covered with white Japanese tissue, and then colored with felt-tip markers. |
|
|
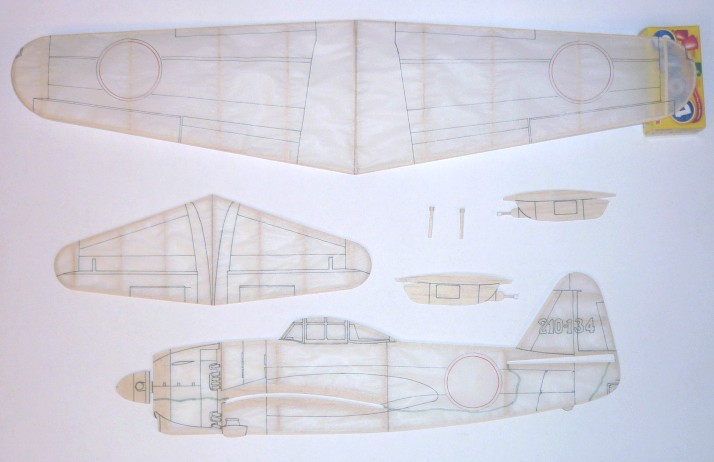
Panel lines and marking outlines were applied using a fine-point felt-tip marker. I used a PIGMA MICRON 02 black permanent marker for the panel lines and marking outlines, and a red MICRON marker for the Hinomaru outlines. The wavy color separation line deliniating the green upper and lower white surfaces on the fuselage was applied using the fine point end of a PRISMACOLOR #PM-31 DARK GREEN felt tip marker, the same marker that will be used to apply the green upper surface coloring. After applying the lines and marking outlines, the model was covered. |
 (Click photo to enlarge)
 |
|
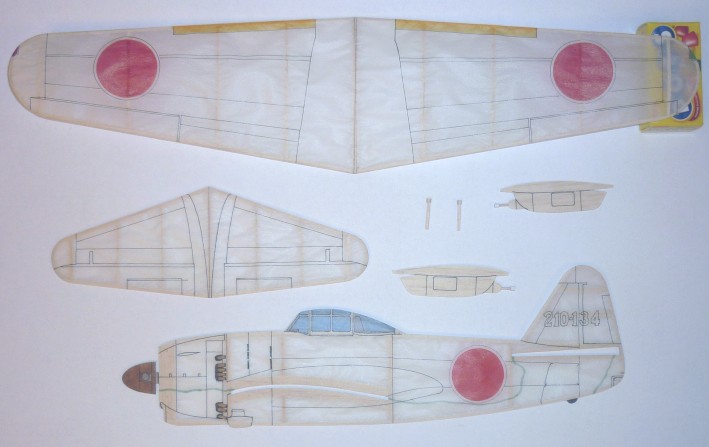
The details were colored in this step. I used a red fine-point SHARPIE to color the Hinomaru and the left wingtip light. PRISMACOLOR #PM-123 Spanish Orange is a good match for the yellow strips on the wing leading edge, a light blue felt tip pen was used for the canopy, PRISMACOLOR PM-88 DARK BROWN was used for the spinner and exhaust stacks, and PRISMACOLOR PM-115 COOL GREY 80% was used for the prop shaft, prop blade hubs, headrest, and the metal outline around the white tail light at the aft end of the fuselage. |
 (Click photo to enlarge)
|
|
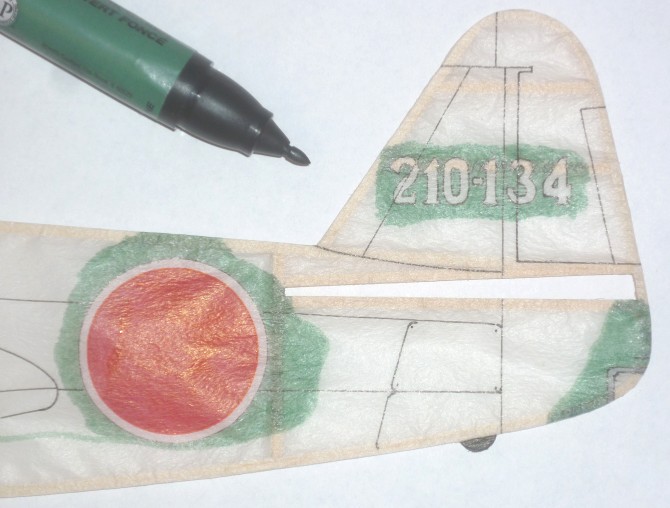
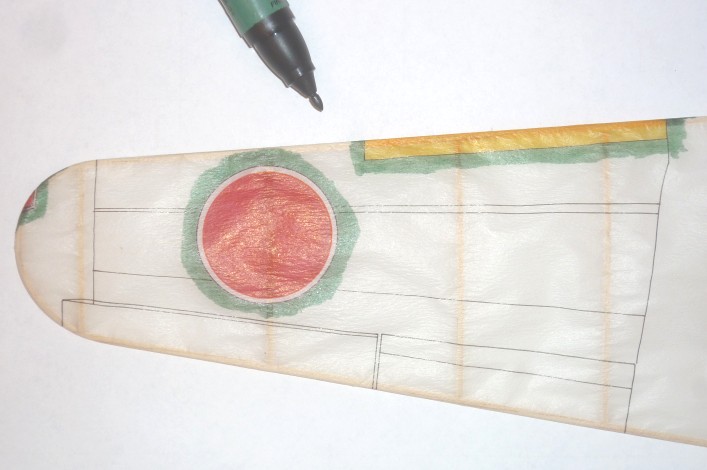
A good match for the upper surface green color is the previously mentioned PRISMACOLOR #PM-31 DARK GREEN felt tip marker. I used the fine-point end of the marker to color around the details. In this picture I've colored around the white tail numbers, the Hinomaru, and the tail light. A black marker was used for the tail wheel. |
 (Click photo to enlarge)
 |
|
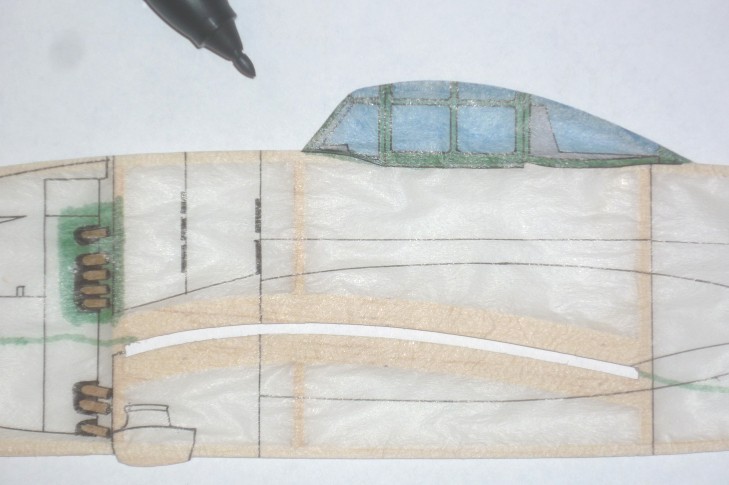
Here the fine point end of the marker has been used to color the canopy frames and color around the upper exhaust stacks . . . |
 (Click photo to enlarge)
 |
|
. . . and here the fine-point end of the marker has been used to color around the yellow wing leading edge strip, the white ring around the wing Hinomaru, and the wingtip lights.
|
 (Click photo to enlarge)
 |
|
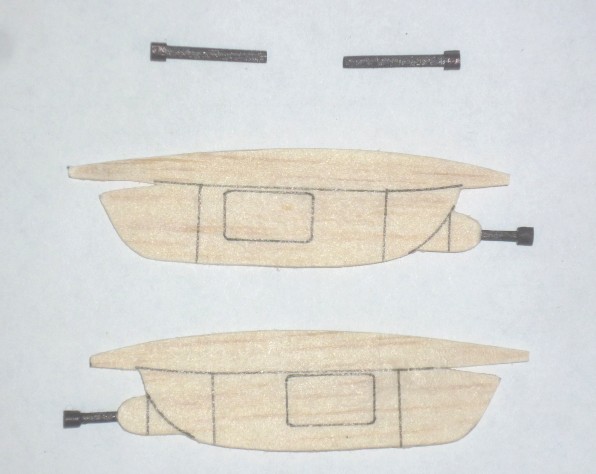
The N1K1 Shiden had four cannon - two in pods under the wing, and two in the wing itself. I covered the under-wing cannon pods with a sheet of white Japanese tissue stuck on with a glue stick. The panel lines were applied with the fine-tip MICORN marker, and then the cannons were glued in place on the pods. The upper cannon barrels in the picture are the internal wing cannons and will be glued to the wing after assembly.
|
 (Click photo to enlarge)
 |
|
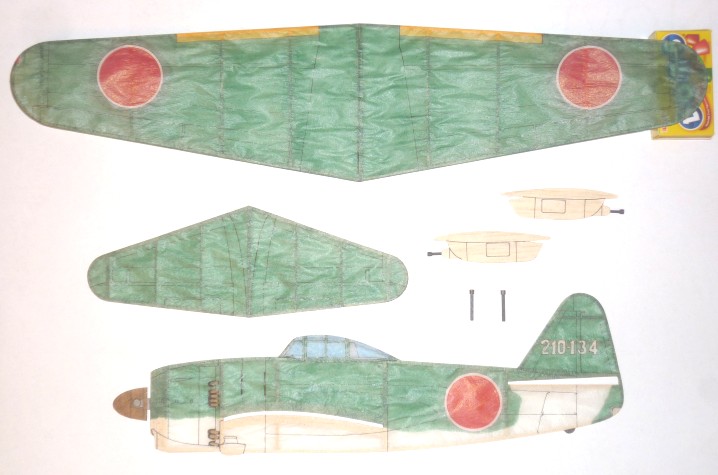
With all the detail coloring finished, the wide end of the PRISMACOLOR PM-31 DARK GREEN felt tip pen can be used to color the rest of the upper surfaces. Here are the finished parts.
|
 (Click photo to enlarge)
 |
|
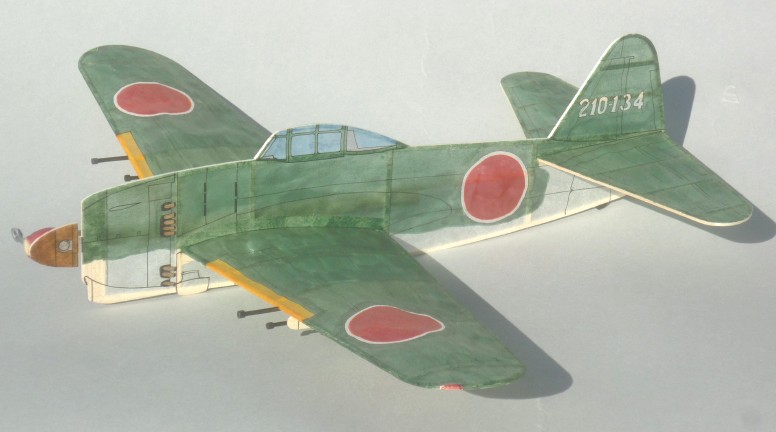
. . . and here's the assembled model finished and ready to fly! |
 (Click photo to enlarge)
 |
|
Michael A. Morrow's AERO ACES - Doing Business since 1995 ! AERO ACES is a TRADEMARK of Michael A. Morrow. © All Images, drawings, plans, articles, and kits, are Registered & Copyrighted by Michael A. Morrow |