|
|
by Michael A. Morrow |

|
|
Very few pictures are available of the R2Y1 Keiun, and those that are, are poor quality black and white, so no color scheme can verified with certainty. However, some educated guesses can be made. Several early pictures show the aircraft an overall uniform color, with white-outlined Hinomaru in all locations, even on the bottom of the wings. The color is lighter than the red of the Hinomaru, so it is not green. It is possible that the aircraft was initially all-natural metal, or grey, with white-outlined Hinomaru, or, as Japanese prototype aircraft in WW II were traditionally overall orange until the very late stages of the war, it could be overall orange, which would explain the white outline on the hinomaru on the bottoms of the wings. Later pictures of the aircraft do show what appears to be a two-tone camoflage, dark on top (most likely green), and lighter on the bottom (the white outline around the Hinomaru on the bottom of the wings can be distinguished from the color on the bottom of the wings, so it's probably not white), but I have chosen to do the earlier scheme, and have chosen orange overall as the color. With that in mind, you'll need to shrink a piece of orange Japanese tissue before you start. See the section on shrinking Japanese tissue for use on No-cals here. |
|
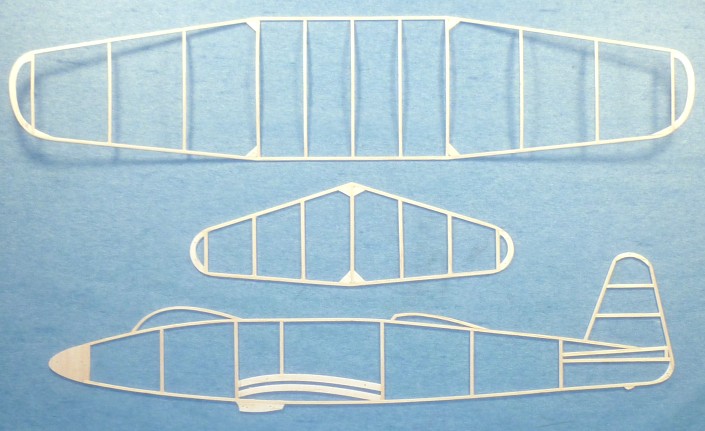
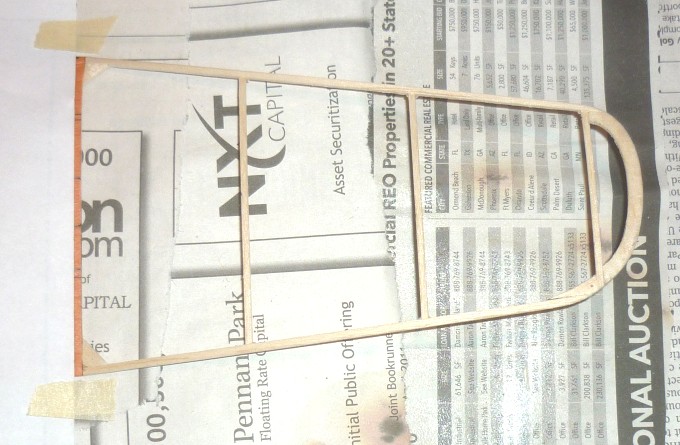
The finished structural parts are shown here. I'm only going to show a couple of tips here, as the aircraft is just one solid color. The first tip is the process I used to cover the center section of the wing. |
|
|
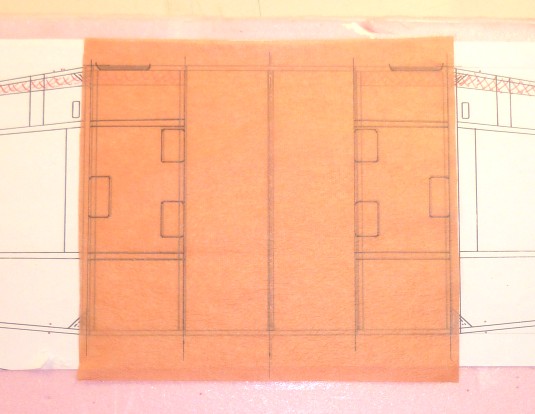
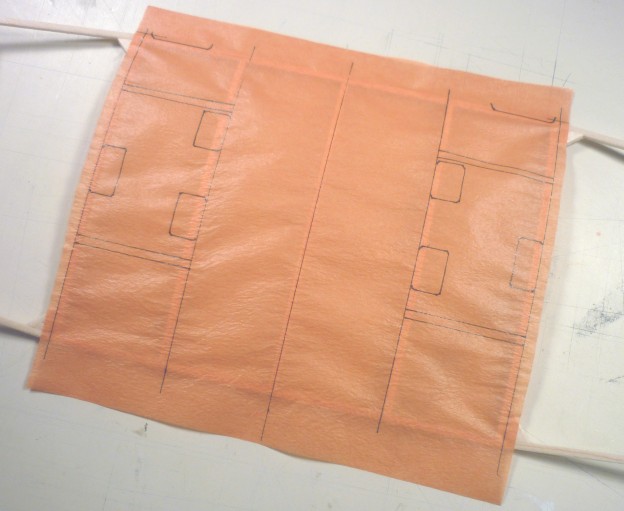
Step one is to cut a piece of orange tissue a half inch or so bigger all around than the center section of the wing, and then iron it flat with a dry iron. After ironing it flat, tape it to the plan and use a fine-point permanent felt-tip marker to apply the panel line details. Iron the tissue again, then place it over the plan and trim it so that it is about 1/8 inch wider than the center section on each side. Do not forget to make alignment marks on the tissue to help align it with the structure when you cover it. |
 (Click photo to enlarge)
 |
|
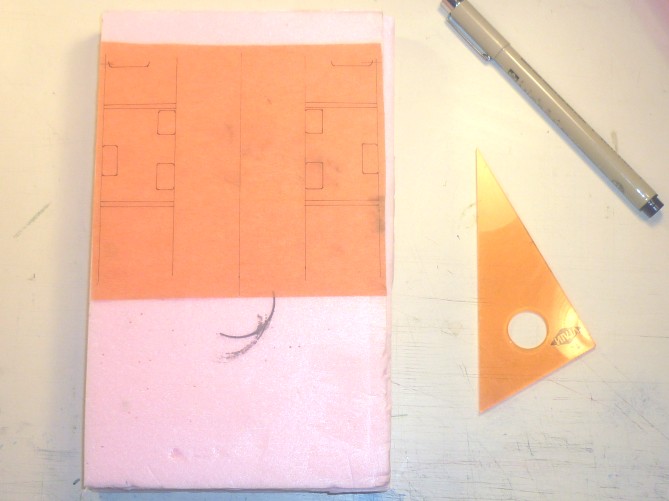
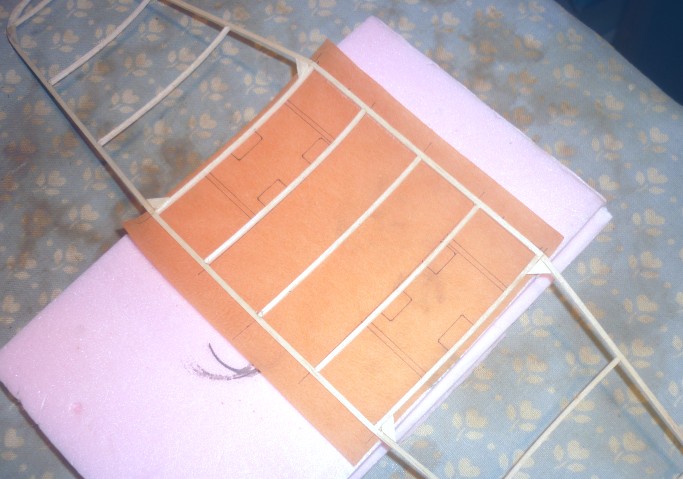
Because both the outboard wing panels have dihedral, you can not simply roll the wing structure onto the tissue on any flat surface. You will need an elevated surface the width of the center section to do this. Here I have cut a piece of foam board the width of the trimmed tissue center section for this purpose. The foam block is an inch thick, which will give just enough room for the wingtips to clear the board the block rests on when rolling the center section onto the tissue. |
 (Click photo to enlarge)
 |
|
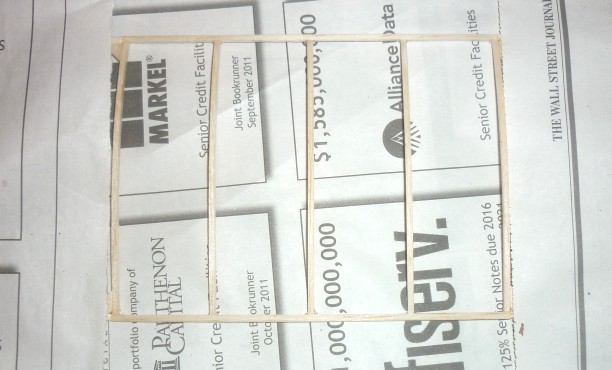
I currently use an inexpensive general-purpose spray mount adhesive to adhere the tissue to the structure. To prevent over-spray on structure not being covered, I have covered the two outer wing panels with sheets of scrap newspaper while I spray the structure center section. |
 (Click photo to enlarge)
 |
|
With the adhesive on the structure, I iron the tissue one last time, place it quickly UPSIDE-DOWN on the foam block, align the structure with the alignment marks I put on the tissue, and roll the wing structure evenly and smoothly right onto the tissue. This needs to be done QUICKLY before the tissue has a chance to absorb moisture out of the air, which it can do in less than 15 seconds. Don't push too hard or you'll squash the structure. :-) |
 (Click photo to enlarge)
 |
|
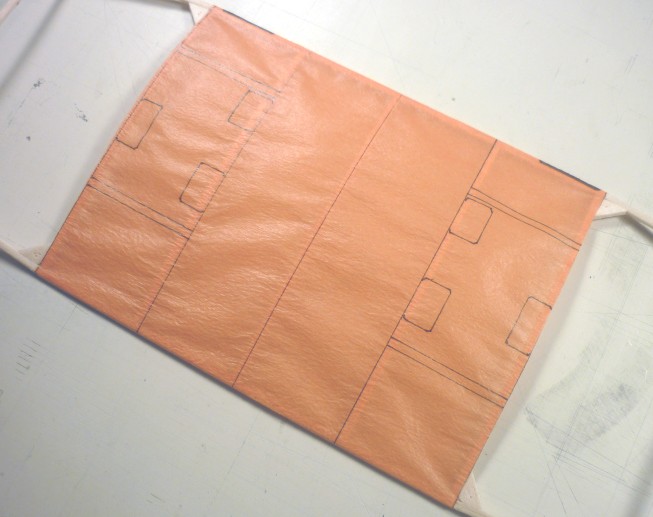
Here is the tissue adhered to the structure center section. |
 (Click photo to enlarge)
 |
|
When the adhesive is dry, trim the excess tissue off, color in the leading edge air intakes with a black marker, and the center section is done. |
 (Click photo to enlarge)
 |
|
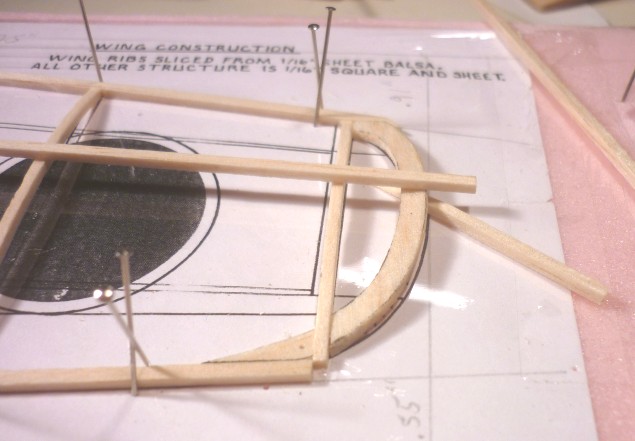
I try to minimize loss of lift at the wingtip, and also make it possible to cover an entire wing panel with one sheet of tissue, by raising the wingtip so that it is the same height as the top of the wing ribs. To do this, build the entire wing structure without the wingtips. Then lay a piece of straight 1/16 square balsa lengthwise across the top of the wing at the wing rib's highest point. Now add the wingtip, and shim the tip up until it touches the 1/16 square strip, as shown in this photo. |
 (Click photo to enlarge)
 |
|
With the center section covered, it's now time to cover the outer wing panels. Mask off the center section by taping a piece of paper over it, but leaving the outer rib exposed (the orange bit on the left). Spray the adhesive on, iron the outer wing panel tissue, place it upside down on the board, and roll the wing panel onto it. |
 (Click photo to enlarge)
 |
|
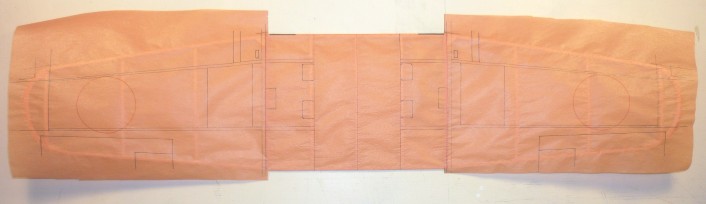
Here are the outer wing panels covered. Note that the Hinomaru are outlined in red, while all the other details are in black. |
 (Click photo to enlarge)
 |
|
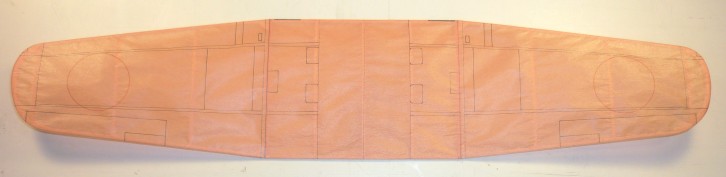
The tissue has been trimmed on the outer panels . . . |
 (Click photo to enlarge)
 |
|
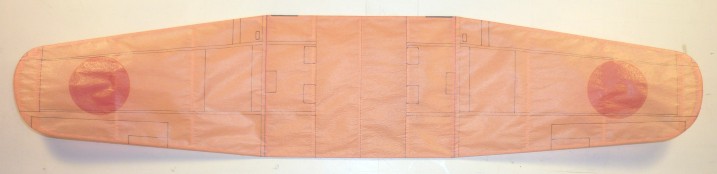
The Hinomaru have been colored red with a red Sharpie . . . |
 (Click photo to enlarge)
 |
|
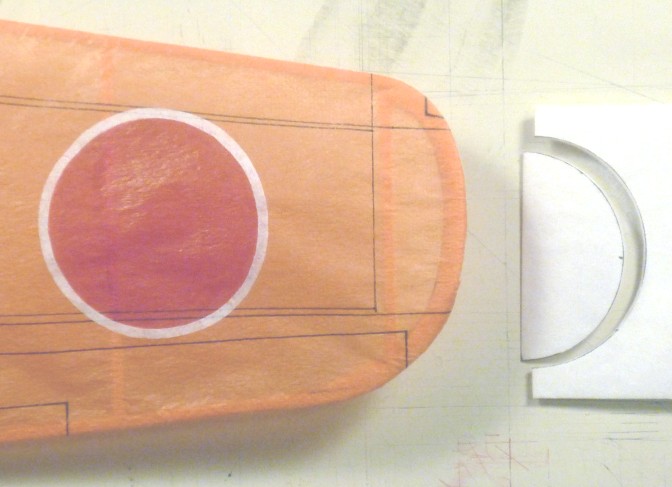
All the Hinomaru on the R2Y1 have a white outline. I used shoebox (wrapping, or domestic) tissue to make the rings because it is more opaque. To make the rings, I folded a piece of bond paper in half, folded two pieces of shoebox tissue in half and slipped them into the bond paper, drew half rings, and cut them out. The rings were glued in place with a glue stick. It was messy and tricky, but the results were definitely worth it, as can be seen in the photo. |
 (Click photo to enlarge)
 |
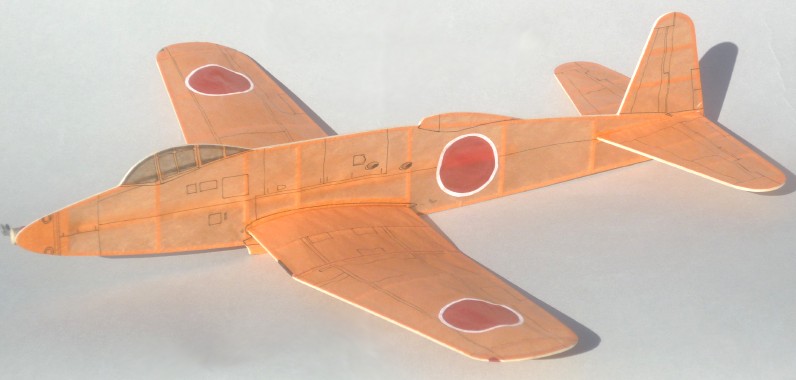
| And here's the finished model ready to fly . . . |
 (Click photo to enlarge)
 |
|
Michael A. Morrow's AERO ACES - Doing Business since 1995 ! AERO ACES is a TRADEMARK of Michael A. Morrow. © All Images, drawings, plans, articles, and kits, are Registered & Copyrighted by Michael A. Morrow |