| Back to the Plastic Scale Modeling page |

|
|
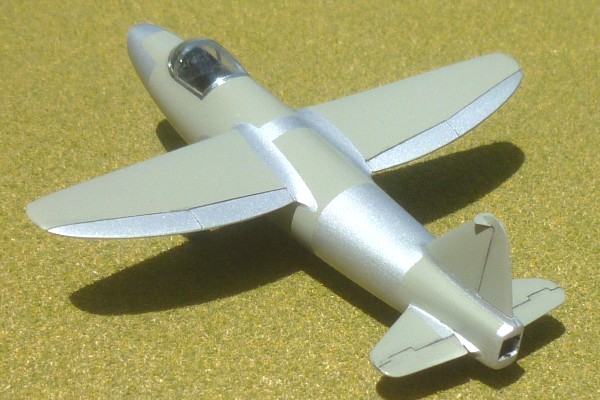
Henkel He-178 V1 the old 1/72 scale Condor kit by Michael Morrow 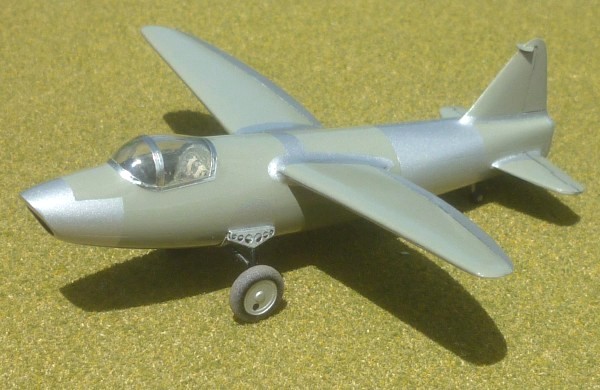
|
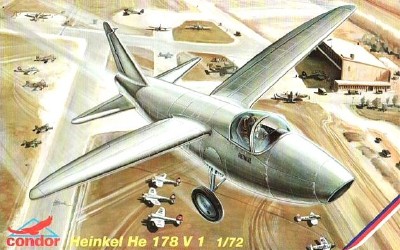 On August 27th, 1939, the Heinkel He-178 V1 became the first German jet aircraft to fly, and also the first jet aircraft to fly in the world. This achievement made it a perfect aircraft to be part of a small "First Jet Aircraft" subset of the Museum of Flight model display called "Aviation Firsts and Record Setters" which ran from February to May of 2010. The other aircraft that were represented in the "First Jets" section of the display were the first British jet, the E.28/39 Gloster Whittle (shown here), the first Italian jet, the Camproni Campini, and the first American Jet, the Bell P-59 Aircomet (to be posted at a later date).
 |
|
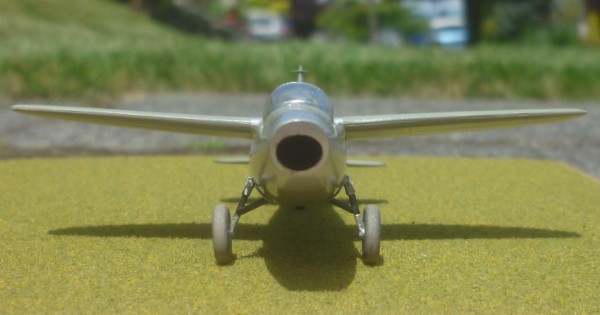
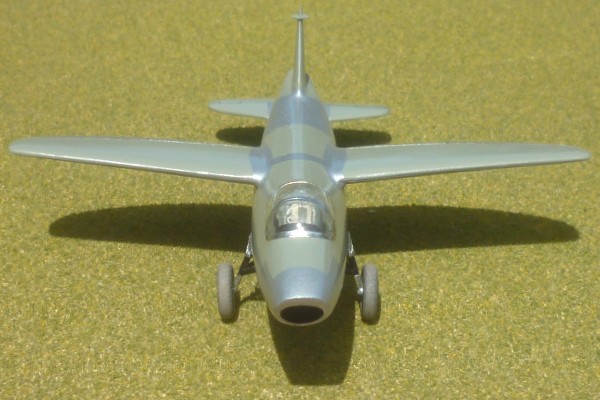
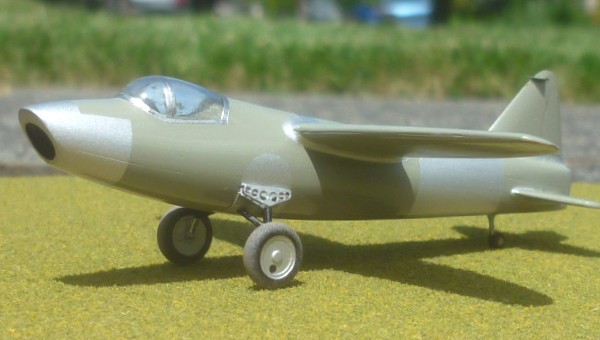
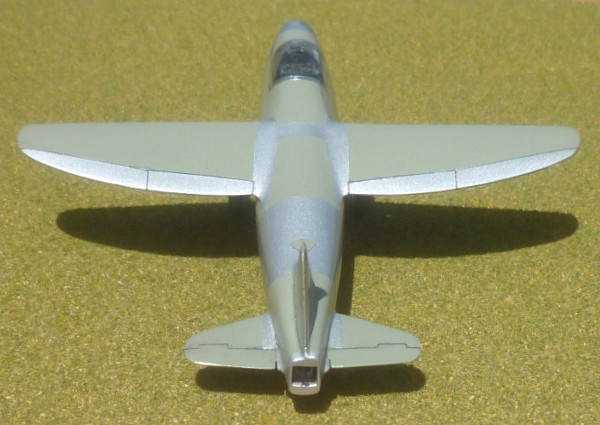
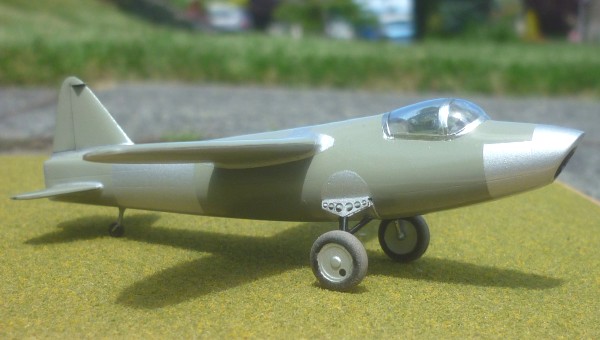
Build Notes This is the old Condor 1/72 scale Heinkel He-178 V1 kit. I'd started the model long ago, but due to dissatisfaction with the results of my seam-filling efforts, it wound up at the back of the bench, where it sat for a good long while. When organization of the "Firsts and Record Setters" display was announced, I re-examined the model. The major components had been assembled, but the wing/fuselage joint was less than satisfactory, in spite of several iterations of the filling/sanding process, which was why it had migrated to the back of the bench to start with. l determined that with a little more effort, the wing/fuselage joint could be fixed, so out came Mr. Putty, and on it went. While waiting for the putty to harden, I removed the canopy, and added seat belts. I originally started this model back in the days before I had discovered the wonders of Future® floor polish, so I cleaned the canopy up, gave it the Future® treatment, let it dry thoroughly, and then glued the canopy back in place. Without taking a picture of the cockpit interior while it was exposed. *Le Sigh*. 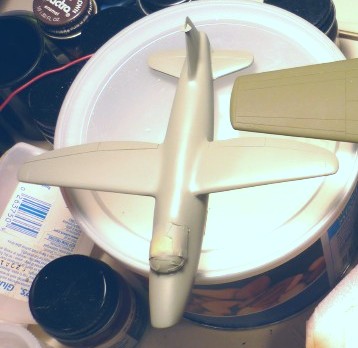 Several more iterations of the filling/sanding process around the wing/fuselage joint were required to achieve a sufficiently invisible joint. The stabilizer/fuselage joints were also filled and sanded, and since the canopy/fuselage fit wasn't the greatest, I masked off the canopy, filled the seams around the edges, and sanded them smooth. The last step before painting was to glue the photo-etch landing gear panels to the fuselage sides. This done, the entire model was sprayed with its base color coat of RLM 02 gray. When the paint was dry, the model was checked for imperfections, the imperfections fixed, and a final coat of RLM 02 gray was applied.
 |
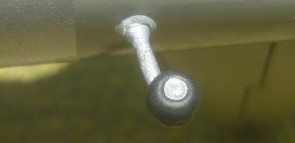
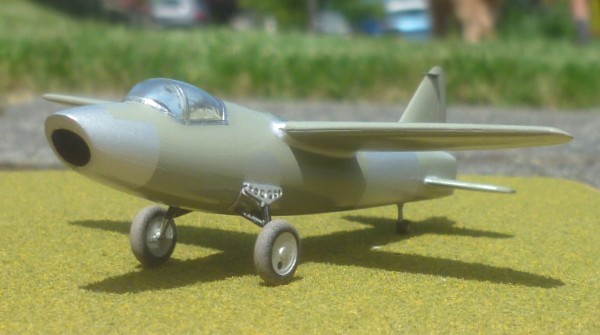
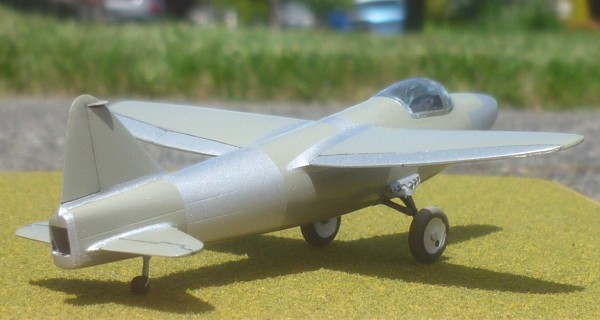
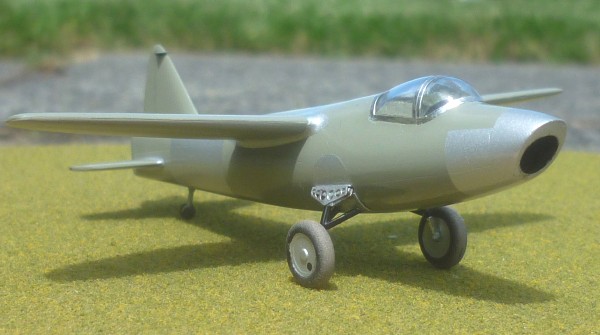
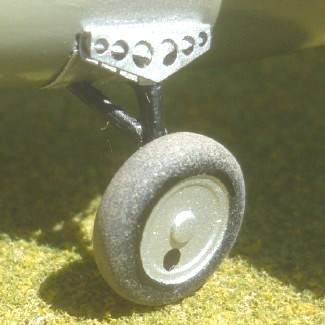 While waiting for the paint to dry on the airframe, the remaining small detail parts, consisting of the wheels and the combination photo-etch and plastic landing gear parts, were cleaned up and painted, black for the struts and oleo, and silver for the top of the gear leg and the photo etch piece. A realistic-looking oleo strut was achieved by wrapping a small strip of chrome Bare Metal adhesive foil around it to give it that highly polished look. A very light spray of flat tan was sprayed on the treads of the tires to simulate mud, and the landing gear parts were finished and ready for assembly.
I didn't have a picture of the gear during assembly, so here's a picture of the completed gear attached to the fuselage. |
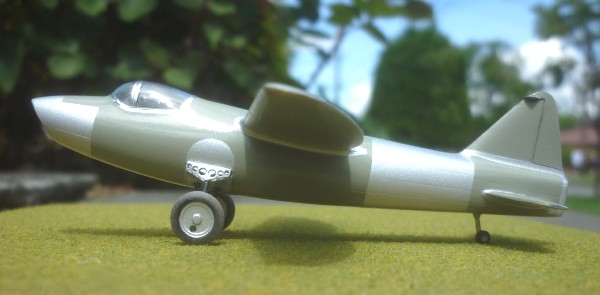
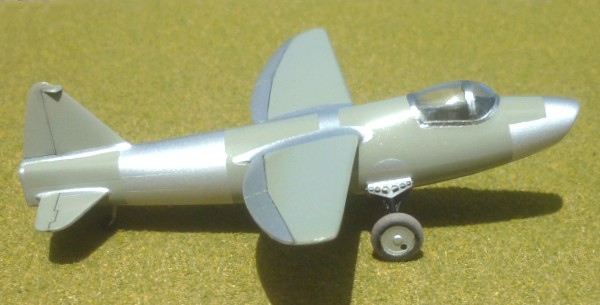
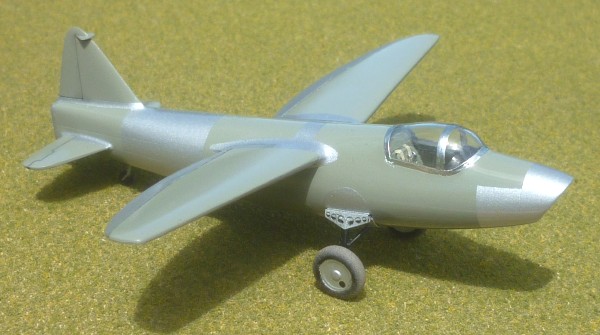
After the airframe base color coat was completely dry, The entire model was masked off so the unfinished metal panels could be painted. These panels included portions of the nose, an entire section of the aft fuelage, all of the fillets between the fuselage and the flying surfaces, the covers over the holes the landing gear would retract into, and the wing control surfaces (ailerons and flaps). The exposed panels were then sprayed aluminum. The next step was to add the canopy frames. I cut thin strips of Bare Metal Foil and applied them to the canopy where the frames were. The effect was very realistic. You can also just make out the seat belts that were added, and that I neglected to get a picture of while the canopy was being Future®'d. *Le Sigh*. Again.
The canopy frames were the last step on the airframe before adding the landing gear, but before the landing gear were added, I sprayed the entire airframe (sans landing gear - don't want gloss-coated flat-black tires) with Future® to give it a polished look. The model was set aside for a couple of days to dry. When the Future® had thoroughly dried, the landing gear parts were fitted to the fuselage and glued in place. . . . the model propped up by the wingtips waiting for the gear to dry . . . 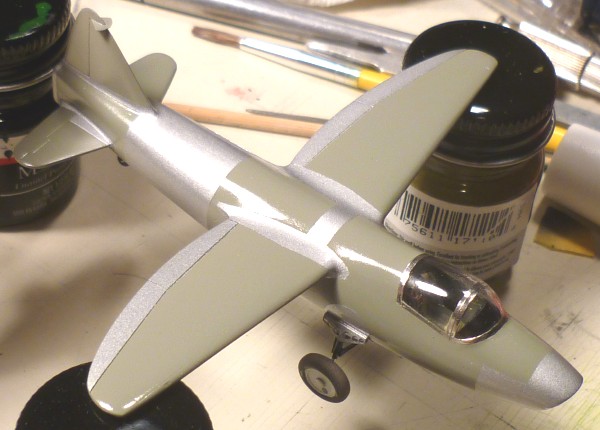
|
|
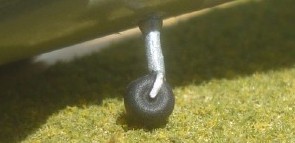
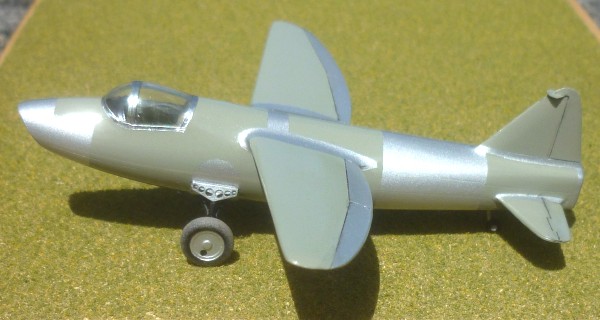
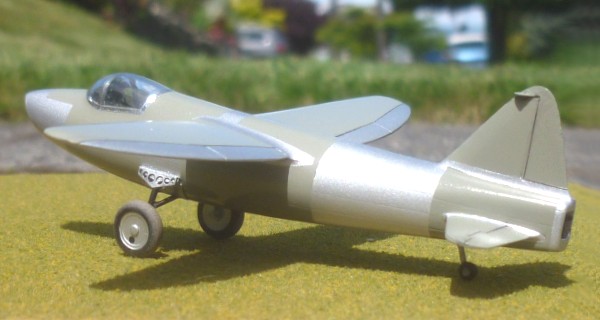
A couple more shots of the landing gear . . . . . . the main gear . . . |
. . and the tail wheel . . . |
 |
  |
. . . Annnnnd a bunch of pictures of the finished model . . .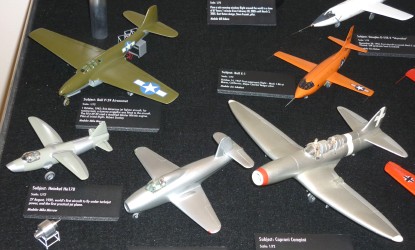 "First Jets" part of the NWSM display. Clockwise from bottom right: Italian Caproni Campini, British Gloster Whittle, German Heinkel He-178, and the American Bell P-59 Airacomet.
Lower left corner: 1/72 scale von Ohain-Heinkel He-S3b turbojet that powered the He-178, modeled by Steve Gallacci. |
|
Another view of the display . . . He-178 on far left. 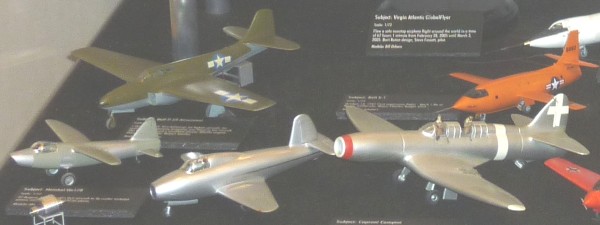
|
|
|

|
|
|
|
|
|
|
|
|
|
|
|
|
| Back to the Plastic Scale Modeling page |
|