| Back to the Plastic Scale Modeling page |

|
|
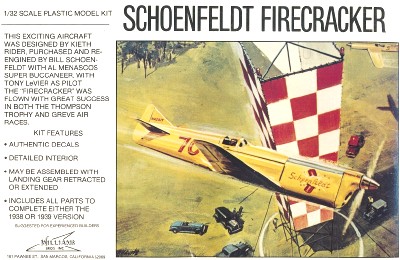
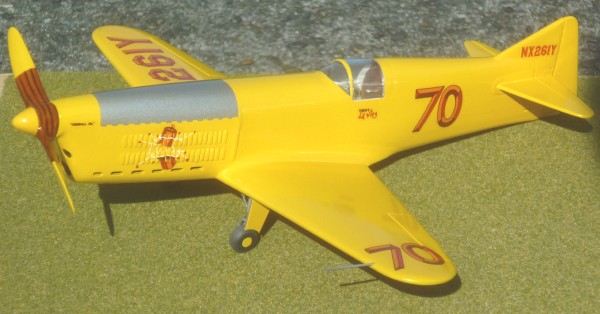
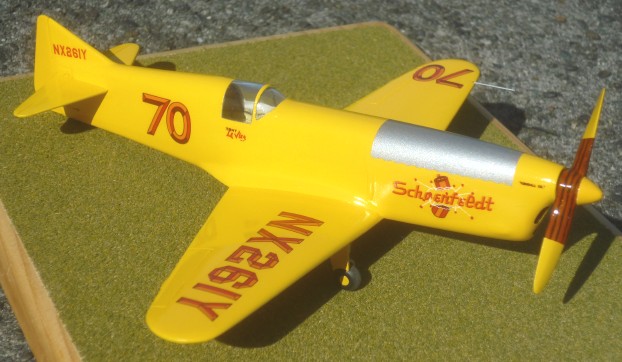
Keith-Rider R-4 Schoenfeldt Firecracker the 1/32 scale Williams Brothers kit by Michael Morrow 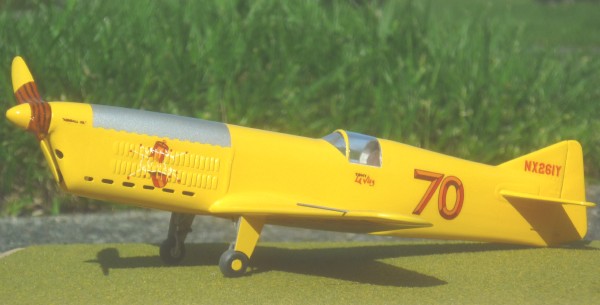
|
 This is the old 1/32 scale Williams Brothers kit. It had been started by someone else, so I got it very cheaply. One landing gear leg was missing, but aside from scratch-building the missing landing gear leg, adding some control cables at the rear, and replacing the very thick rudder, the model was built right out of the box.
This was one of their early kits, and while fairly accurate, several points needed a bit more attention than one might expect from one of today's unbelievably high quality kits. 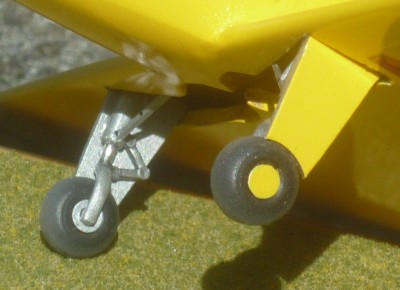 To build the model with the landing gear down, the landing gear bay holes must be cut out of the bottom half of the wing! I did not have to do this, as the person that started the model had already done so. The plastic is quite thick, so the holes were a tad crude. There wasn't much I could do with them except clean them up a bit, which I did. It would have been easier if the wings had not already been glued together, but it didn't look too bad when finished. To build the model with the landing gear down, the landing gear bay holes must be cut out of the bottom half of the wing! I did not have to do this, as the person that started the model had already done so. The plastic is quite thick, so the holes were a tad crude. There wasn't much I could do with them except clean them up a bit, which I did. It would have been easier if the wings had not already been glued together, but it didn't look too bad when finished. |
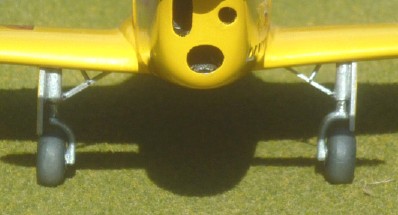
I also had to scratch-build (carve) a new landing gear leg to replace one that was missing. It worked out better than I would have thought, and was almost indistinguishable from the other gear leg (aside from being a mirror copy). |
|
The wing trailing edges and the stabilizer and tail surfaces were quite thick. The rudder was the most egregious offender, so I cut the rudder from the fin and replaced it with a tapered one made from sheet plastic. I left the stabilizers alone, but there was no getting around the wing trailing edges though. Easily 1/16 inch thick, I probably spent as much absent-minded-television-watching time with one of those wonderful "Tropical Shine®" 4-grade sanding sticks working on the wing trailing edge than on almost any other project I've ever worked on. I finally succeeded in achieving a respectable knife-edge trailing edge though, so it was worth it. 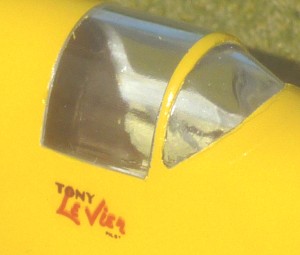 I also spent a considerable amount of time on the canopy. The canopy was quite thick, didn't fit the fuselage particularly well, and had large gaps. A close examination of period photos of the aircraft showed a very close-fitting seamless canopy, so that is what I strove for. If I recall correctly, I dipped the canopy in Future® floor polish to get a nice clear finish, and let it dry. Then I masked off the clear parts of the canopy with several layers of masking tape to protect them, leaving the frames exposed, and glued the canopy in place. I then filled and sanded the canopy (yes, I sanded the canopy (frames) - read on . . .) and the fuselage until a smooth surface between the two was achieved. After priming and the final paint color, I removed the masking tape from the clear canopy sections, and sprayed the whole model with Future® floor polish for the requisite gloss racer finish. The result was a seamless canopy/fuselage join, which was what I was hoping to achieve, and the canopy was also clear. It was however, still quite thick, obscuring the interior, which was not necessarily a bad thing, as I didn't add much more detail than the kit provided.
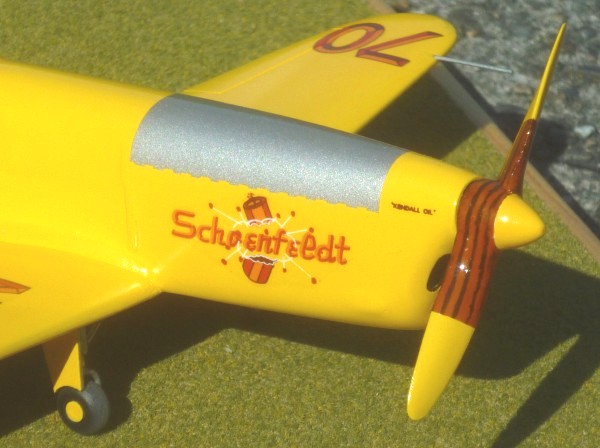
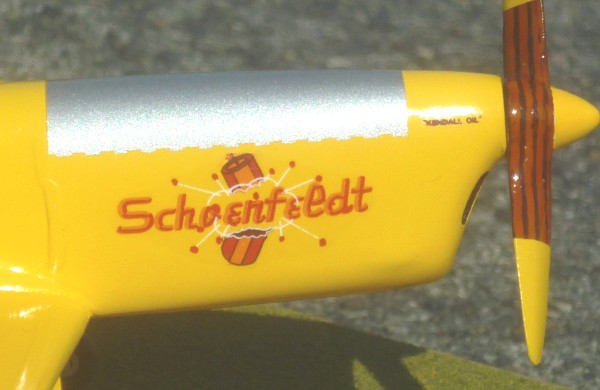
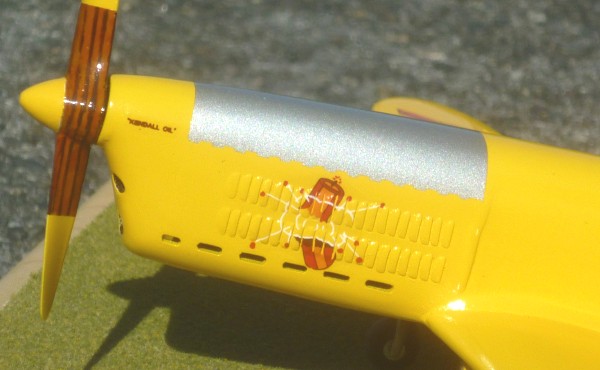
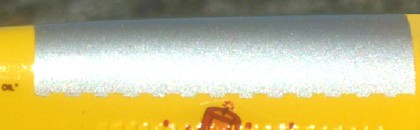 The R-4 Firecracker's metal engine radiator was surface-mounted to the top of the cowl. The radiator was fastened on the sides with a "piano-hinge" type fastener. By carefully examining of a period photograph, I was able to count the number of "hinge" reliefs, and with the radiator length scaled from drawings, drew up the hinge on my old drafting board with a really sharp pencil. A piece of wide "Tamiya Masking Tape"® (Tamiya yellow tape) was taped down to the clean board, the drawing taped over the top, and using metal straight-edges, a very sharp #11 blade was used to cut through the drawing and the tape to produce a hinge "mask" to be used for painting. After the final coat of yellow paint had dried, I sprayed a protective coat of Future® floor polish on it and allowed it to dry before trying to paint the radiator. After the Future® had dried completely, the radiator hinge mask was applied to the cowling top, the model was masked off, and the radiator was painted. If I was to do it over, I would probably try using Bare-Metal® adhesive foil to reproduce the radiator, as by period accounts, the radiator was highly polished. For this model though, the paint simulated the radiator reasonably well.
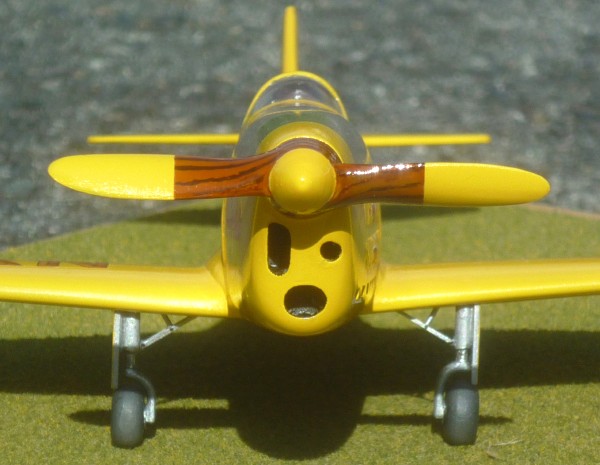
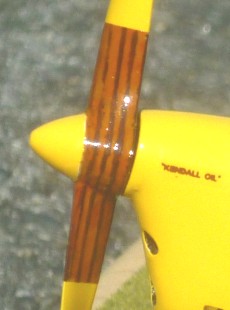 The propeller on the R-4 Firecracker was conspicuously laminated, so there was no point trying to get around it. It had to look laminated. I employed a trick learned from one of the NWSM club members to show wood grain on the prop. After cleaning up the plastic on the prop itself, I painted it flat white, and then gave it a final coat of yellow. After allowing the yellow to thoroughly dry, I masked off the yellow prop tips and spinner, and sprayed the wood part of the prop a light flat tan. Then with a very small paintbrush, I carefully painted the laminations by hand with flat froof brown. In retrospect, this might also have been done by masking the tan with thin strips of yellow tape, but hand-painting turned out okay, and gives a good simulation of "grain". When the brown had dried, I applied a coat of Tamiya® "Clear Orange" over the wood section of the prop. This produces a very realistic-looking polished wood finish.
 |

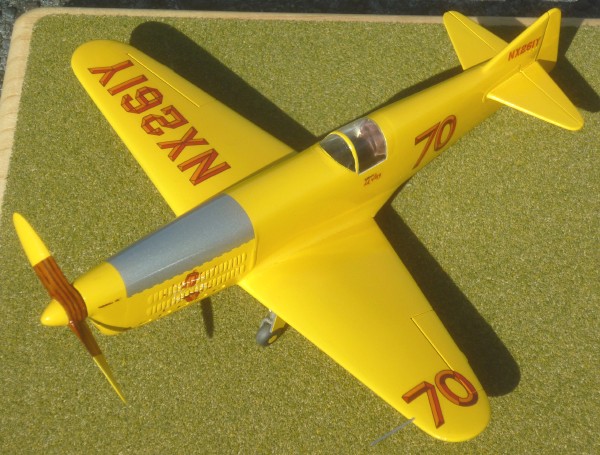
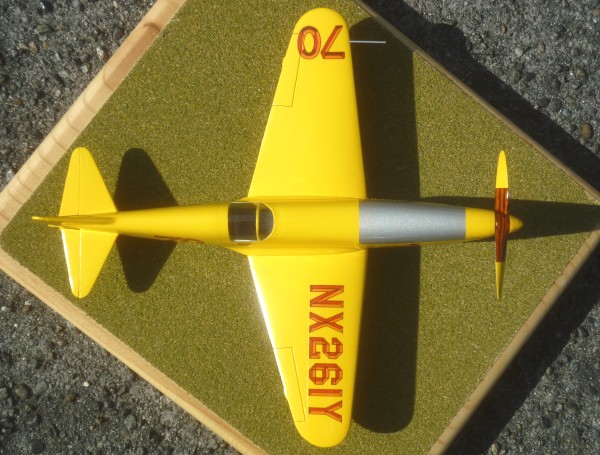
The kit decals went on well over the gloss floor polish finish. The decals were fairly old, so before using them, I coated them with Microscale Industries' "Liquid Decal Film"®. The "Liquid Decal Film"® is a real life-saver when using old decals that might have microcracks in them. Without it, those old decals usually explode into a million pieces when they hit the water, but with it, they work quite well. One does have to trim them close after using the decal film, but the minor additional effort is insignificant compared to being able to still use the decals. With a little work, the kit makes up into a very pretty little model, and overall, I was quite pleased with the way it turned out. Apparently, so were the judges at the IPMS Seattle Spring Show one year, as it was awarded a first place in it's category. 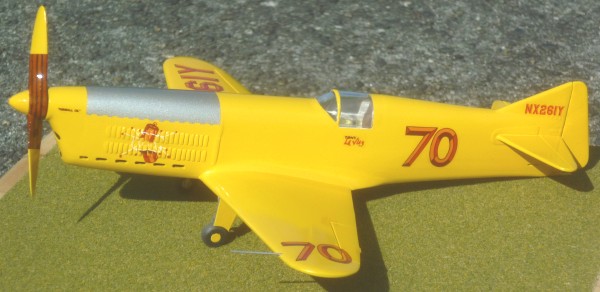 |
 |
 |
 |
 |
 |
 |
 |
 |
| Back to the Plastic Scale Modeling page |
|